A blog to share printable sewing patterns created by me - an ex professional pattern maker who turned indie.


(Scroll down to the end of the post for download links)
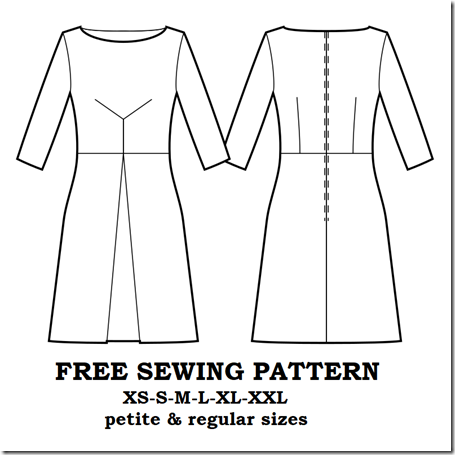
The dress today features a bateau neckline, 3/4 sleeves, A line skirt with center front box pleat and below the knee length. The front bodice darts have been moved to make a Y shaped detail to add some structure to the whole look. This is a modest design that is suitable for almost any kinds of occasion – from work to dinner date. Feel free to use any fabric you like, because each will give you a different delight.
I personally love the A line skirts, because it helps hide my narrow hips and balance with the heavy top while not undermining my height (you know I’m short, just 1.55m). It is also great when you make it with flowy fabric – imagine how it moves when you walk, so feminine and sweet! I have quite some simple A line skirt dresses, so this time I am adding a center front pleat. Although it will not affect much if you sew the dress with prints, but if you sew the dress with solid color, it will become a nice detail.
As usual, the dress pattern is created in pdf format using A4 paper. I can also create the pattern in other paper sizes (A0 to A4, Letter, Tabloid), so please inform me if you need them.
Print the patterns on A4 paper at actual size/no scaling/100%. Not sure how to print and cut the patterns? Check the guide here.
Do you want to add side seam pockets to the pattern for additional convenience? Just go ahead because it is too easy, just follow the quick instruction here.
Again, happy sewing! I look forward to seeing your masterpiece!
XOXO
Tiên the Little Sewist
Cutting instruction:
The cutting instruction is for the garment with facings. If you choose to sew it with bias binding, skip the front facing and back facing pieces. If you choose to sew with bodice lining, skip the facing pieces and cut a set of front and back pieces in lining fabric.
A. Front Skirt - 1pcs
B. Back Skirt - 2pcs
C. Sleeve - 2pcs
D. Front - 1pcs
E. Back - 2pcs
F. Front Facing – 1pcs + Fusible Interfacing – 1pcs
G. Back Facing – 2pcs + Fusible Interfacing – 2pcs
Download links for the dress:
Check for your size in the Size Chart before downloading. Not finding your size? Comment your height, bust – waist – hip measurements in the comment box below and I will send you the custom-made pattern for you as soon as I can!
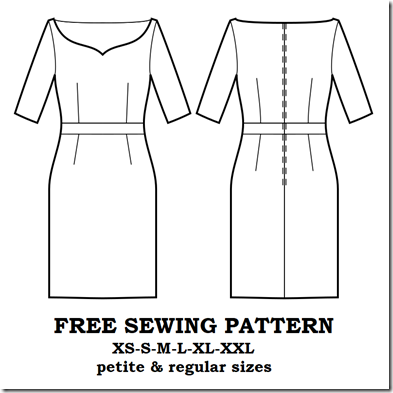
This feminine dress features a sweetheart neckline, half sleeves and below the knee length. I personally think black is a bit too gloomy for such a beautiful piece, so I decided to make it in florals. I am going to post it as soon as I finish the garment.
The pattern is created in pdf format using A4 paper. I can also create the pattern in other paper sizes (A0 to A4, Letter, Tabloid), so please inform me if you need them.
Print the patterns on A4 paper at actual size/no scaling/100%. Not sure how to print and cut the patterns? Check the guide here.
Do you want to add side seam pockets to the pattern for additional convenience? Just go ahead because it is too easy, just follow the quick instruction here.
Again, happy sewing! I look forward to seeing your masterpiece!
XOXO
Tiên the Little Sewist
Cutting instruction:
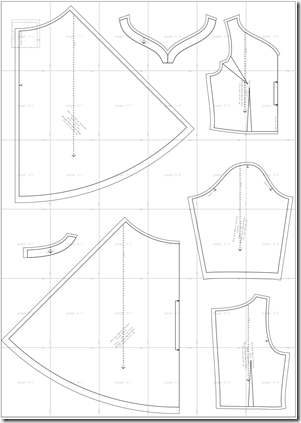
After taping down all the pages following the instruction, the overall layout of the pattern pieces is much like this (the arrangement of pattern pieces will vary a bit with sizes because I want to utilize all space to result in least number of pages):
The cutting instruction is for the garment with facings. If you choose to sew it with bias binding, skip the front facing and back facing pieces. If you choose to sew with bodice lining, skip the facing pieces and cut a set of front and back pieces in lining fabric.
A. Front Skirt - 1pcs
B. Back Skirt - 2pcs
C. Sleeve - 2pcs
D. Front - 1pcs
E. Back - 2pcs
F. Front Facing – 1pcs + Fusible Interfacing – 1pcs
G. Back Facing – 2pcs + Fusible Interfacing – 2pcs
Download links for the dress:
Check for your size in the Size Chart before downloading. Not finding your size? Comment your height, bust – waist – hip measurements in the comment box below and I will send you the custom-made pattern for you as soon as I can!
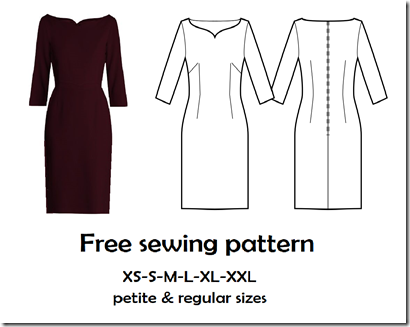
Ahhh, I am in love with this beautiful sweetheart bateau neckline as soon as I stumbled upon this design by Goat Fashion on Pinterest. I decided to make myself one, and this is the pattern that came along with the pattern for myself. Hope you will enjoy it!
This dress has a sweetheart bateau neckline, below the knee length and 3/4 sleeves. I must say it is a formal meeting ready dress. Just put this dress on, choose a matching hat, and you can even go to the Royal Ascot! Of course, it is also quite moderate, so you can be confident to wear it to work or a professional meeting.
The dress pattern I share in this post has a straight skirt. If you prefer a pencil design, narrow down the side seams, starting from the fullest part of the hip (marked with notches) down to hemline. It is a really quick modification, mark a point at the hemline at the desired width of skirt hemline and draw a straight line from the hip notch to the marked point. Then redraw the seam allowance and cut the pieces. It is similar to the demonstration below – the red lines are new side lines, the blue lines are new seam allowance lines.
And if you find the length of the dress unflattering, just feel free to lengthen or shorten it to your taste. It’s always worthy to try.
The pattern is created in pdf format using A4 paper. I can also create the pattern in other paper sizes (A0 to A4, Letter, Tabloid), so please inform me if you need them. Print the patterns on A4 paper at actual size/no scaling/100%. Not sure how to print and cut the patterns? Check the guide here.
Do you want to add side seam pockets to the pattern for additional convenience? Just go ahead because it is too easy, just follow the quick instruction here.
Again, happy sewing! I look forward to seeing your masterpiece!
XOXO
Tiên the Little Sewist
Cutting instruction:
After taping down all the pages following the instruction, the overall layout of the pattern pieces is much like this (the arrangement of pattern pieces will vary a bit with sizes because I want to utilize all space to result in least number of pages):
The cutting instruction is for the garment with facings. If you choose to sew with bodice lining, skip the facing pieces and cut a set of front and back pieces in lining fabric instead.
A. Front - 1pcs
B. Back - 2pcs
C. Sleeve - 2pcs
D. Front Facing – 1pcs + Fusible Interfacing – 1pcs
E. Back Facing – 2pcs + Fusible Interfacing – 2pcs
Download links for the dress:
Check for your size in the Size Chart before downloading. Not finding your size? Comment your height, bust – waist – hip measurements in the comment box below and I will send you the custom-made pattern for you as soon as I can!
(Scroll down to the end of the post for download links)
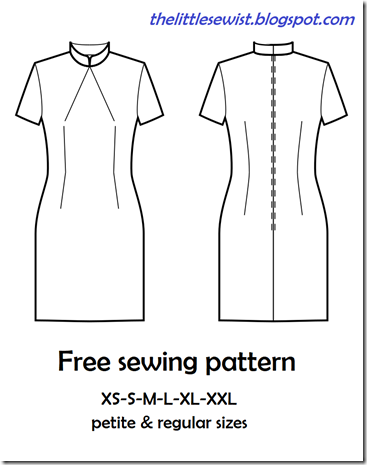
Mandarin collar is a staple to any wardrobe with Asian influence. It is a stand up collar that gives the garment a nice new look. I have been interested in Mandarin collar for a long time, and I think this type of collar is really stylish. A simple dress can be upgraded to a formal event ready piece with this kind of collar. Modest, and still drawing attention to the graceful neck of the wearer.
I created a pattern for a sheath dress with this beautiful collar. I move the darts to the center neck to draw attention to the neckline. This dress can be made with solid color, or with prints – especially Asian style prints.
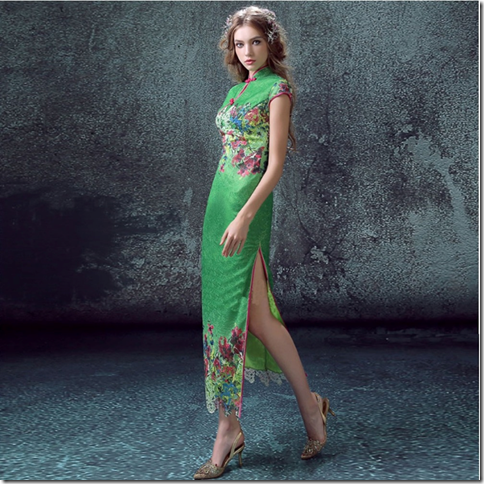
This dress is below the knee long, but you can lengthen or shorten it to your liking. You can even skip the kick pleat at the center back seam and make a slit at the side of the dress to make it look like a cheongsam – a traditional dress of Chinese women. For example, you can have a look at this beautiful piece here:
The dress pattern I share in this post has a straight skirt. If you prefer a pencil design, narrow down the side seams, starting from the fullest part of the hip (marked with notches) down to hemline. It is a really quick modification, mark a point at the hemline at the desired width of skirt hemline and draw a straight line (the red lines) from the hip notch to the marked point. Then redraw the seam allowance (the blue lines) and cut the pieces. You can see in the demonstration below:
The pattern is created in pdf format using A4 paper. I can also create the pattern in other paper sizes (A0 to A4, Letter, Tabloid), so please inform me if you need them.
Print the patterns on A4 paper at actual size/no scaling/100%. Not sure how to print and cut the patterns? Check the guide here.
Do you want to add side seam pockets to the pattern for additional convenience? Just go ahead because it is too easy, just follow the quick instruction here.
Again, happy sewing! I look forward to seeing your masterpiece!
XOXO
Tiên the Little Sewist
Cutting instruction:
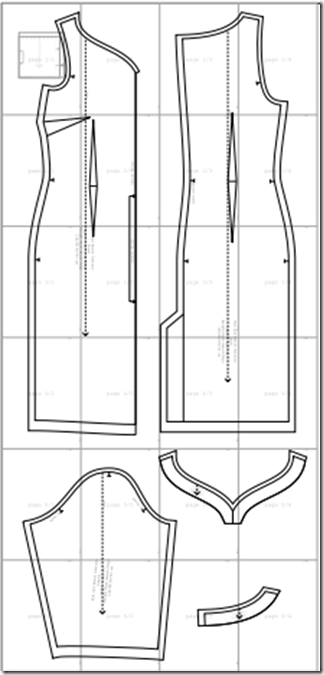
After taping down all the pages following the instruction, the overall layout of the pattern pieces is much like this (the arrangement of pattern pieces will vary a bit with sizes because I want to utilize all space to result in least pages):
A. Front - 1pcs
B. Back - 2pcs
C. Sleeve - 2pcs
D. Stand Up Collar Outer - 2pcs
E. Stand Up Collar Inner - 2pcs
Download links for the dress:
Check for your size in the Size Chart before downloading. Not finding your size? Comment your height, bust – waist – hip measurements in the comment box below and I will send you the custom-made pattern for you as soon as I can!
(Scroll down for download links)
This dress is inspired by the Victoria Beckham sheath dress. It features a below a deep V neckline, knee length and contrast waistband. This dress is amazingly classic and versatile, and I can imagine wearing it to many kinds of events, from professional setting to an extra-curricular event where all the guests need to wear something classic and dressy. It is an office-ready baby that can save you a lot of time searching in your wardrobe for an outfit. Just wear it with a pair of classic black or nude high heels, and you are ready to go!
This color combination will create an illusion of a smaller waist than actual. If you worry white color can expose the flaws in your figure, a dark color or a good print can help you out. To my personal taste, I love the combination of black and white, red and black, navy and yellow, green and black, etc. There are countless color combinations that you can choose to make this beauty.
The dress pattern I share in this post has a straight skirt. If you prefer a pencil design, narrow down the side seams, starting from the fullest part of the hip (marked with notches) down to hemline. It is a really quick modification, mark a point at the hemline at the desired width of skirt hemline and draw a straight line (the red lines) from the hip notch to the marked point. Then redraw the seam allowance (the blue lines) and cut the pieces. You can see in the demonstration below:
The pattern is created in pdf format using A4 paper. I can also create the pattern in other paper sizes (A0 to A4, Letter, Tabloid), so please inform me if you need them.
Not sure how to print and cut the patterns? Check the guide here.
Wondering why I do not add the side seam pockets to the pattern? Because it is too easy, just follow the quick instruction here.
Again, happy sewing! I look forward to seeing your masterpiece!
XOXO
Tiên the Little Sewist
Cutting instruction:
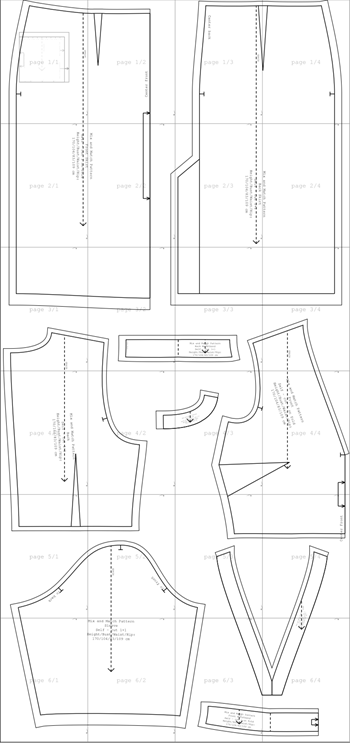
After taping down all the pages, the overall layout of the pattern pieces is like this:
The cutting instruction is for the dress with facings. If you choose to sew the dress with bias binding, skip the front facing and back facing pieces. If you choose to sew the dress with bodice lining, skip the facing pieces and cut out front and back pieces in lining fabric.
A. Front Skirt - 1pcs
B. Back Skirt - 2pcs
C. Front - 1pcs
D. Back - 2pcs
E. Sleeve - 2pcs
F. Front Facing - 1pcs + Fusible Interfacing – 1pcs
G. Back Facing - 2pcs + Fusible Interfacing – 1pcs
H. Front Waistband - 1pcs
I. Back Waistband – 2pcs
Download links for the dress:
Check for your size in the Size Chart before downloading. Not finding your size? Comment your height, bust – waist – hip measurements in the comment box below and I will send you the custom-made pattern for you!