The COVID-19 has been going on and does not have any signs of stopping, and we all must brace ourselves and get prepared to deal with it for a long time. Many readers told me that they cannot find mask making materials any where and must look for alternatives from the items in their homes.
Many people come to Tiana’s Closet website looking for a pattern to sew their own fabric face mask to cope with the COVID-19 pandemic. And I am happy to provide at least 4 ways to sew masks, from the super simple one for those who only know how to sew straight lines, to more complicating one that requires some skills. See my other posts in the DIY masks series here:
We have plastic nose wire, elastic, non-woven fabric for filters, anti-microbial fabric masks, hand made fabric masks to meet your needs. All items are ready in stock and will be shipped from Toronto, Canada. Same day shipping for orders before 3:00 PM. Free standard shipping for orders from US$75.00.
However, I have been receiving emails from readers who do not know how to sew at all, asking me if I know a way to make a face mask without sewing. And I realize that “Oh, there are many people out there who never touched a needle, let alone sew their own mask.” And although I know many people are sewing masks to give, many more people do not have access to a mask – or they have to wait for their masks to arrive, and as far as I know, delivery is now slower than ever due to the COVID-19 virus.
Then what do we do if we don’t have a mask, and do not know how to sew AT ALL?
I have the answer for you, let’s make a no sew face mask! It is not as good as a sewn face mask, but it can help you survive the days you wait for your mask to arrive (or until you learn how to sew).
The no sew face mask is really simple and can be made in a few steps.
WHAT YOU NEED:
– A handkerchief 10in x 10in (or scarf, bandana, square piece cut from your T shirt, etc)
– Two rubber bands (alternatives can be found at the end of the post)
HOW TO MAKE A NO SEW FACE MASK
1. Lay the handkerchief flat on the table (or the floor).
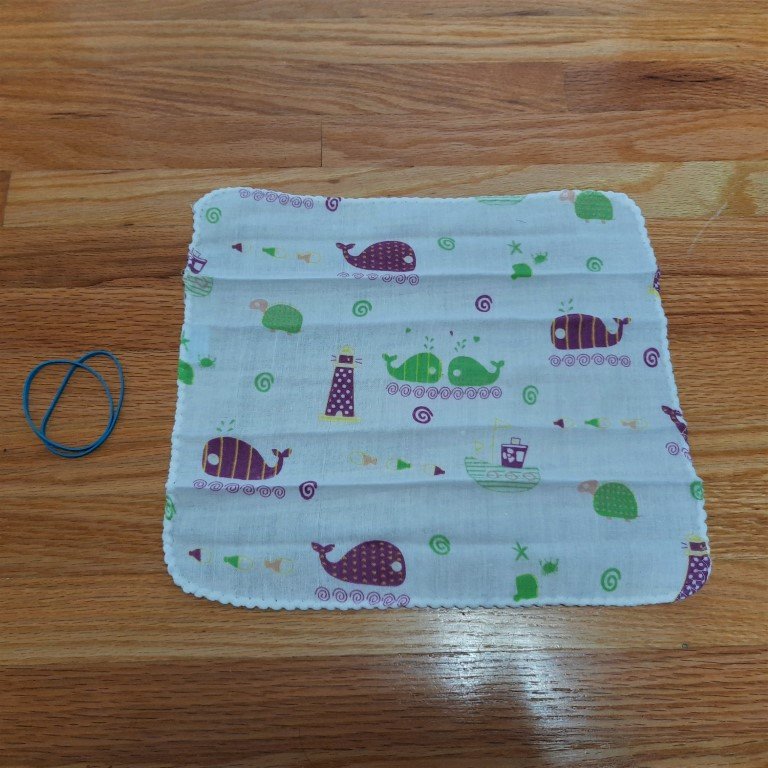
2. Fold one side of the handkerchief to the center line. Repeat with the other side. Now you get two ends meeting at the center line.
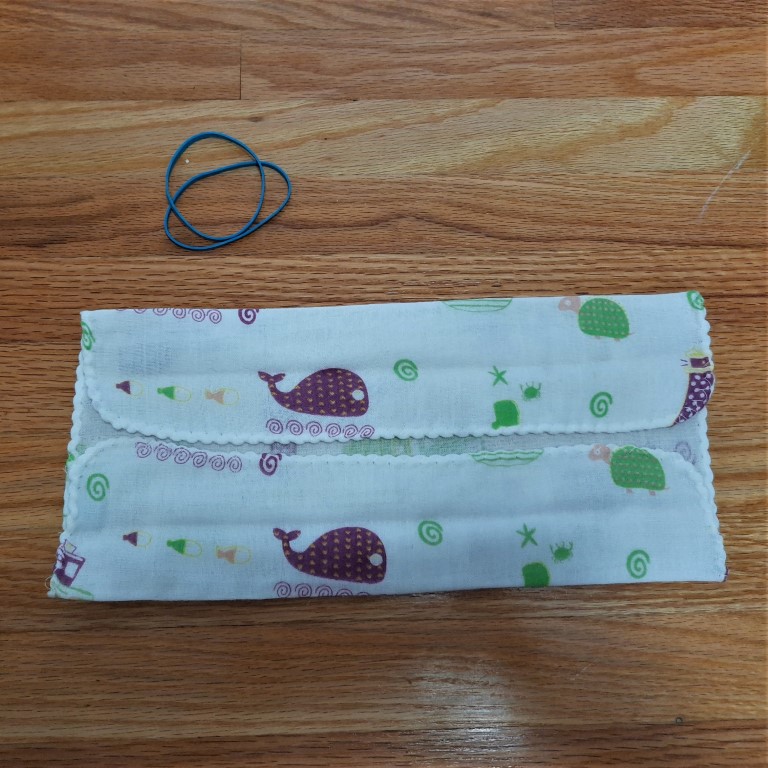
3. Fold the handkerchief again like in step 1.
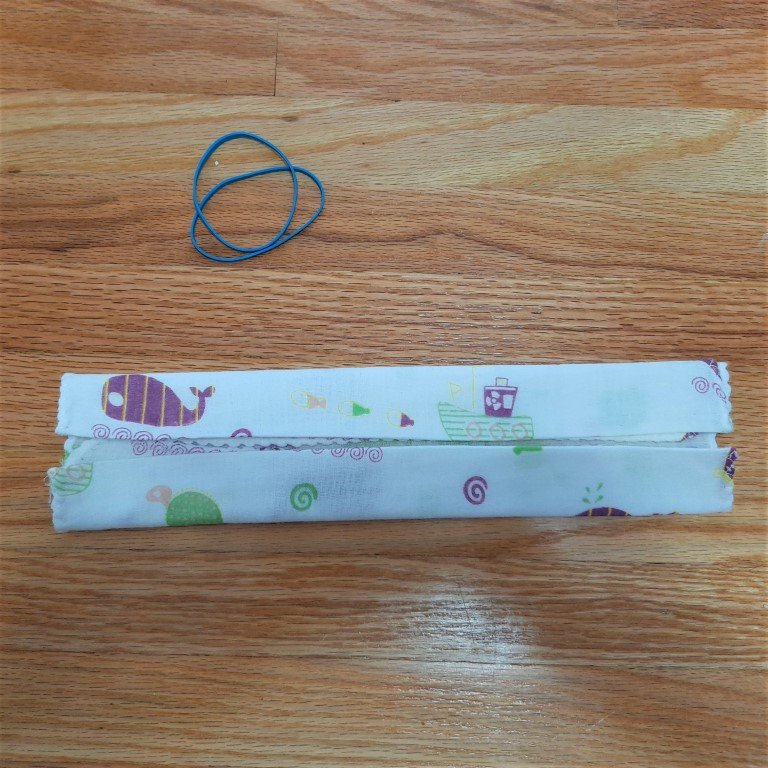
4. Put the rubber band through the short ends of the folded handkerchief and fold the short ends towards the center.
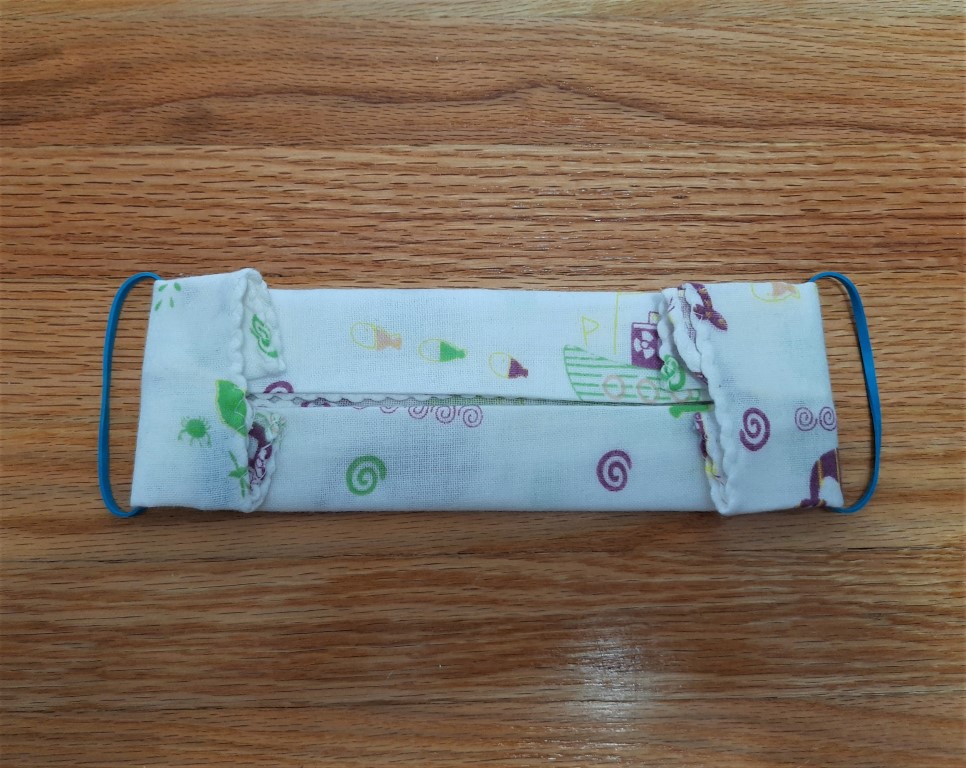
Now you got it, the no sew face mask! Simple, huh? It fits quite well, similar to my folded face mask. But you will need to re-make it every time you use it.
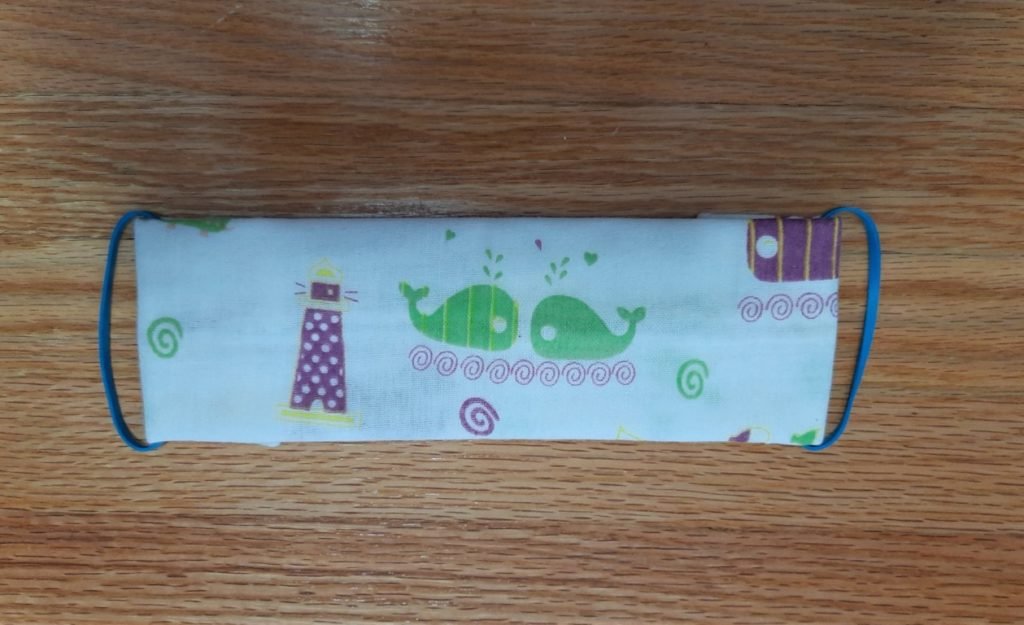
To put the mask on, you will need to put the folded mask on your face and pull the ear loops to your ears, then gently pull the flaps towards your nose and your chin.
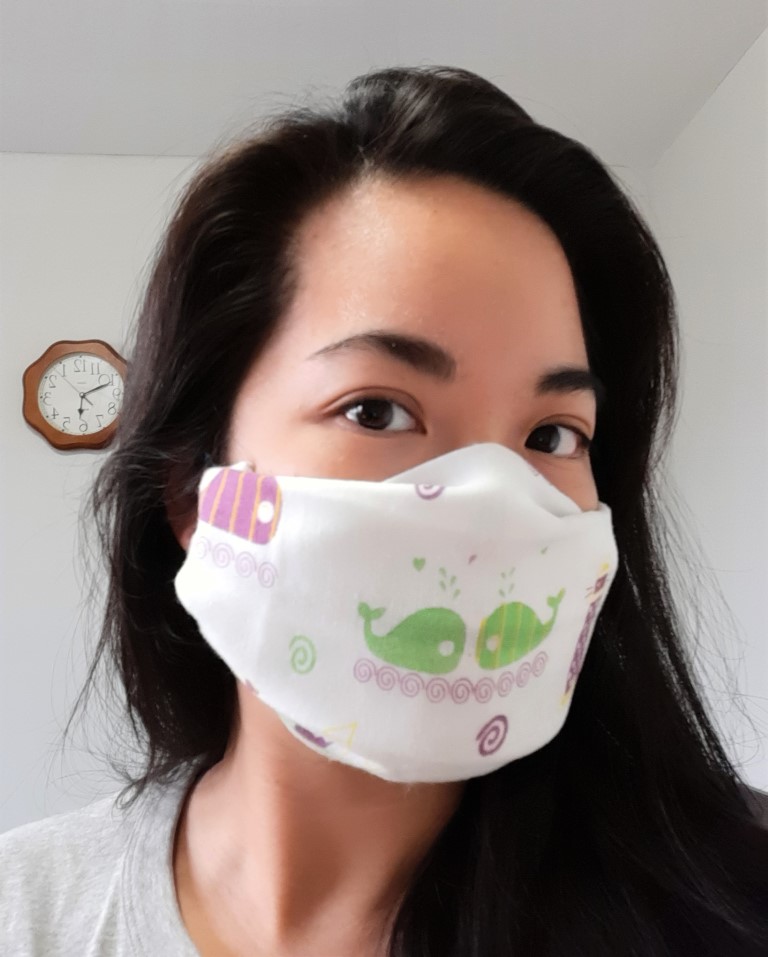
Ta-da! Now you have your own no sew fabric mask. It only takes you about 1 minute to make one, with the items you have ready in your house.
Of course, some may ask me, what if I do not have a handkerchief or rubber bands? I have come up with a few alternatives below:
ALTERNATIVES TO HANDKERCHIEF
– An old T shirt
– Bandana, scarf
– Any fabric item with rectangular shape, choose jersey or knitted fabric so that it does not fray
Any kind of fabric will work, as long as you cut them into a square of 10in x 10in.
ALTERNATIVES TO RUBBER BAND
– Strips cut from old T shirt – pull them so they curl to themselves and make them look similar to a round elastic cord.
– Strips cut from pantyhose, tights or leggings
– The elastic cuffs of socks
– Hair bands
Any alternative materials must be soft and elastic, because they will hang on your ears. I prefer strips from T shirt and pantyhose best, because they are softest and most elastic.
Handkerchief is one of the essential items to carry with you. It is not only practical (you will find lots of time you need to wipe your hands or face, or tie your hair up and all you need is to pull your handkerchief out), but can also be a sign of your personality. Put a design on the corner of the handkerchief, and you have a unique item that belongs only to you!
Many people make handkerchiefs for themselves and also to give. Handkerchiefs with unique designs make great presents – imagine your beloved ones always keep your handkerchief with them. Quite a happy feeling, isn’t it? I do make a lot of handkerchiefs to use and give to my family and friends.
Sewing a handkerchief is also a simple project that does not take you much time or require much sewing skill. You only need to know how to sew a straight line, with sewing machine or just your hands, to make your own handkerchief. It is also a pleasant activity, when you are tired of making complex projects!
And the best thing is that it does not require you much fabric – a yard of 60 inch wide fabric can make 20 handkerchiefs!
Now let’s get started!
What you’ll need:
1. Materials
– A piece of cloth/fabric of your choice
– Thread of similar color to the main color of the fabric
2. Tools
– Scissors
– Ruler or tape measure
– Pencil/fabric marker
– Needle (for hand sewing) or sewing machine
How to make your own handkerchief in just 3 simple steps:
1. Iron and lay the fabric flat
2. Cut the fabric into your desired measurements
Measure the fabric using your ruler or tape measure and draw the lines to get a square. The handkerchief can be made in any size that you want. For example, the most common handkerchiefs often measure at 10 ½ x 10 ½ in.
Always remember to leave about ¼ in for seam allowance if you don’t want the handkerchief coming out smaller than you expect. Cut the fabric ¼ in from the lines, or if you are not confident with cutting parallel to the lines, draw before cutting.
3. Sew it
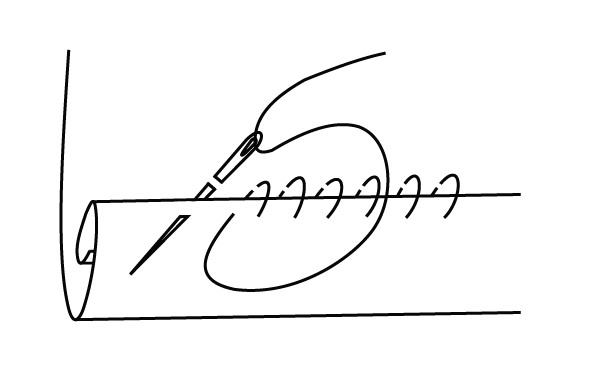
Fold all four sides of the fabric and make a narrow hem with a straight line. If you do not have a sewing machine, it’s fine, you can always hand sew it. Check my video for hand sewing instruction of how to make your own handkerchief. I can show you how to sew a hand rolled hem.
If you are using a sewing machine, it may get a bit tricky at the corners. You can get by it after practicing. But personally, I love hand sewn handkerchiefs, just because I love the softer hand rolled hem.
This is how you sew a narrow hem.
4. Decorate the handkerchief (optional)
There are many ways you can make your handkerchief unique. Doodle on it with permanent marker. Or embroider your name or something cute on it.
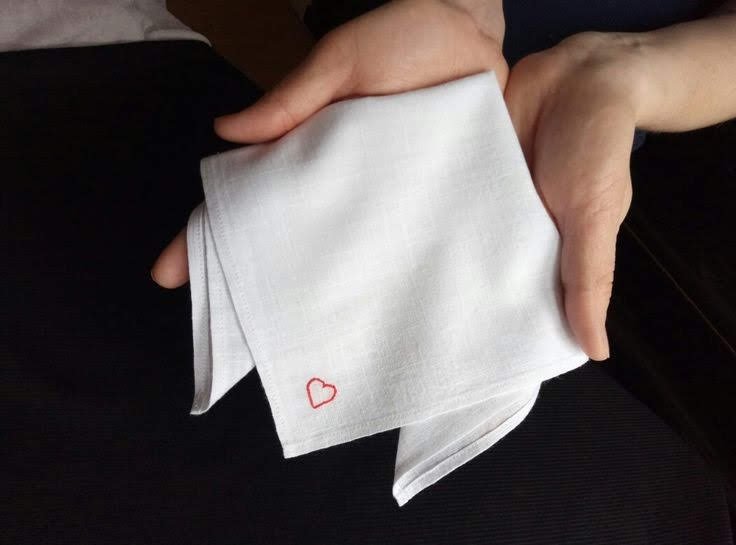
Just a small heart at the corner, and it makes the handkerchief special!
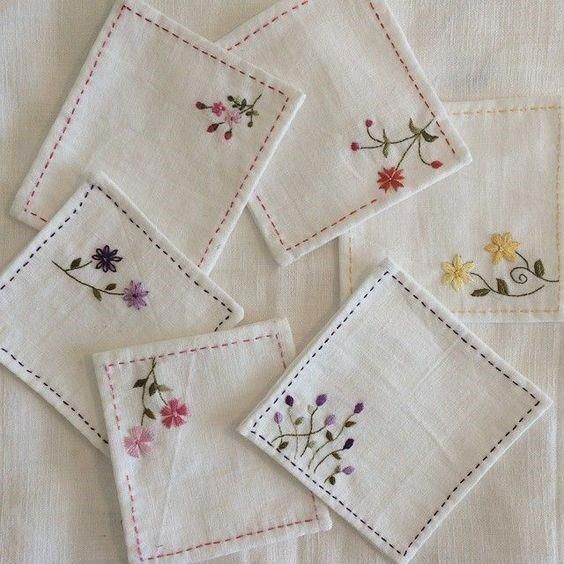
These are some embroidered handkerchiefs to inspire you with ideas. Do they look cute to you?
As the COCID-19 pandemic continues to worsen day by day, I have been staying at home and making as many masks as possible to donate to hospitals. It is also a good chance for me to make new friends who are also sewers, and they are cutting all the fabric they have in hand – bed sheets, old shirts, pants – to make masks. I believe that although we are not frontline workers who directly fight against the coronavirus, we can help.
Not long ago, I came across a video on Facebook (and I forgot to save the link) of a group of scientist in Czech. They explained why Czech seemed to be quite peaceful in this COVID-19 crisis. They did everything similar to what Canada, the U.S and other governments do: telling people to stay at home, practice social distancing, cough/sneeze etiquette. But one thing that they did differently: requiring everyone, yes, everyone, not only the ones who were already sick, to wear mask when they are out. They proved that 95% of the droplets emitted when someone cough or sneeze are caught inside the mask (no matter if it is a medical grade mask, or a simple homemade mask). And when everyone wears mask, people are protecting each other from the pandemic. Thousands of people in Czech have started sewing masks at the early stage of the pandemic, and everyone in the country was provided with masks.
I also believe that this is a great way to prevent the spread of the COVID-19. After all, if we all wear masks, I protect you, you protect me, and we can all win. That’s why I have been making masks an give them away. I hope that we can all have at least a few masks to wear, not only to protect ourselves, but also protect others.
I also give out materials to local sewers in Toronto to make face masks. I do not have much, but some elastic, non-woven fabric, nose wire can help people, and I am happy about that. I also sell them in my small shop for just a small amount of money to cover the cost of me buying them and giving out.
I am so touched when I receive little gifts from other sewers who came and take the elastic or nose wire hung in front of my door. And I am happy to make new friends in this difficult time (although we never really meet because of social distancing). This really helps me to overcome the boring days inside the four walls.
By the way, I discovered a totally new way to sew a mask. It is so simple that it does not require a pattern, and the only sewing skill that you need is sewing straight lines. I am making masks in this way and think that it is so much faster than the previous ones (the classic fitted mask and the folded mask).
The fit of this style is similar to the folded mask, and it is easy to add a pocket for filter.
Let’s start making this new style of mask – I name it The Easiest DIY Face Mask Ever!
If you are looking for materials to make face mask, visit our little store here:
We have plastic nose wire, elastic, non-woven fabric for filters, anti-microbial fabric masks, hand made fabric masks to meet your needs. All items are ready in stock and will be shipped from Toronto, Canada. Same day shipping for orders before 3:00 PM. Free standard shipping for orders from US$75.00.
Step 1: Cut a rectangular piece of fabric on fold. If you have smaller pieces of fabric or want different color at each side, you can cut 2 pieces. The dimension:
– Female face: 17.5cm x 20.5cm (6.89in x 8.07in)
– Male face: 21.5cm x 23.5cm (8.47in x 9.25in)
– Kid’s face: 15cm x 18cm (5.9in x 7.1in)
Step 2: Place the pieces right side facing and sew around, leave a small opening.
Step 3: Clip the corner and turn the mask inside out.
Step 4: Insert the nose wire through the opening (you can skip this if you don’t have one). Fold the opening in, hold the nose wire closely to the edge and topstitch all around.
Here’s how it looks after topstitching.
Step 5: Fold the mask and draw 4 lines as shown in the picture.
Step 6: Sew the 4 lines that you drew, backstitch to secure.
And this is the front.
Step 7: Attach a 12.5cm/5in long elastic cord to each side of the mask. You can replace elastic with long fabric strings and tie at the back of your head. The length of the elastic may vary depending on the elasticity of your material, so feel free to try before actually sewing it in.
And voilà! You got it – the Easiest DIY Face Mask Ever. Do you believe me now? I bet you can never find any other easier one with this nice fit.
And here is a summary of the steps in case you want to save it to your device:
I also have a version of this mask with pocket. I will update the post soon, with a video tutorial.
Now, grab your scissors and start cutting fabric. Masks for all!
The world is now falling apart with this hateful coronavirus. I read the news every day and find my heart heavy with more and more confirmed cases and deaths. And I feel even sadder with the attitude of many people. They stock up on all neccessity just like they are seeing doomsday. Many elderly cannot get the things they need because younger and stronger people collected them all.
My mother says this is the worst thing ever happens in her 70-year long life – not the pandemic, but the panic that causes shortage of face masks, toilet paper, instant noodles and other neccessities.
I feel that we need to share more. Don’t rush to the supermarkets and grab all the toilet paper and hand sanitizers, leave some for people behind you. Don’t act like there will be nothing left if you don’t take some stuffs home. The stores will restock next day. You cannot use up a whole pack of toilet paper in just one day, right?
Now back to the main topic today.
The post that has most views on my blog recently is the one about face mask pattern. I know that it reaches people all around the world and feel so happy to see that I can help.
Many people sent me messages about not being able to follow my instruction to sew the mask because they have never sewn before. And I think I should look for a simpler pattern, one that requires less skill, and can still be protective against the (probably airborne) COVID-19 virus.
And there it is, the simplest pattern that I share with you today. It takes only a few minutes from start to finish.
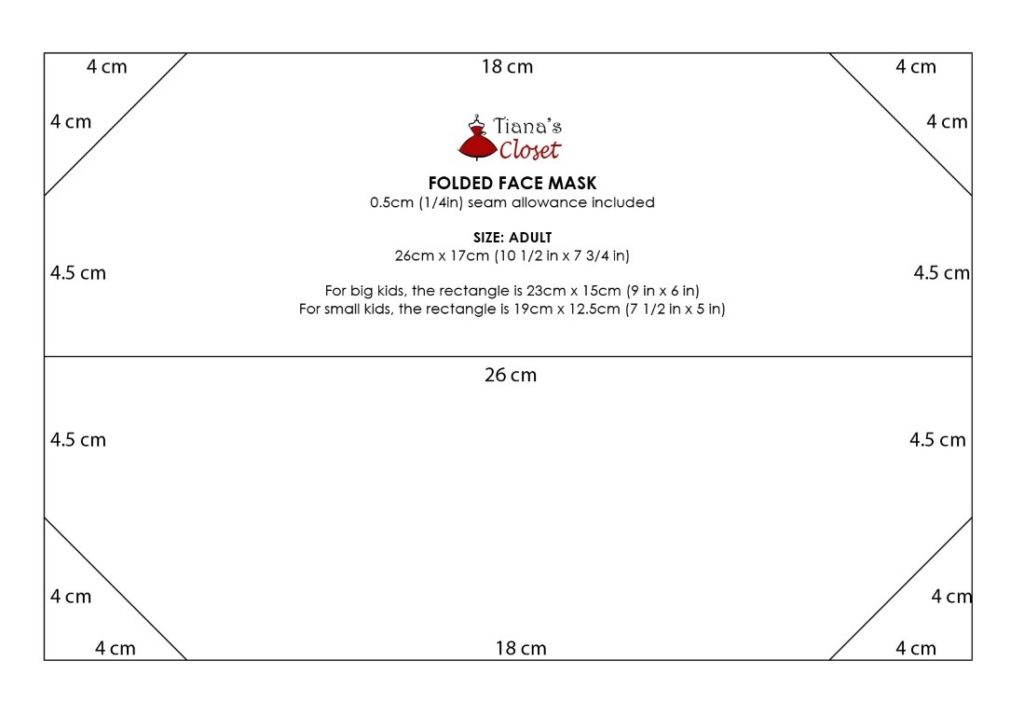
The best thing about this mask is that you don’t need a pattern to sew it. Just draw a rectangle with a few additional lines, and you are ready to sew. Please see the picture below for specific measurements.
If you are looking for materials to make face mask, visit our little store here:
We have plastic nose wire, elastic, non-woven fabric for filters, anti-microbial fabric masks, hand made fabric masks to meet your needs. All items are ready in stock and will be shipped from Toronto, Canada. Same day shipping for orders before 3:00 PM. Free standard shipping for orders from US$75.00.
Folded face mask pattern
Sewing instruction:
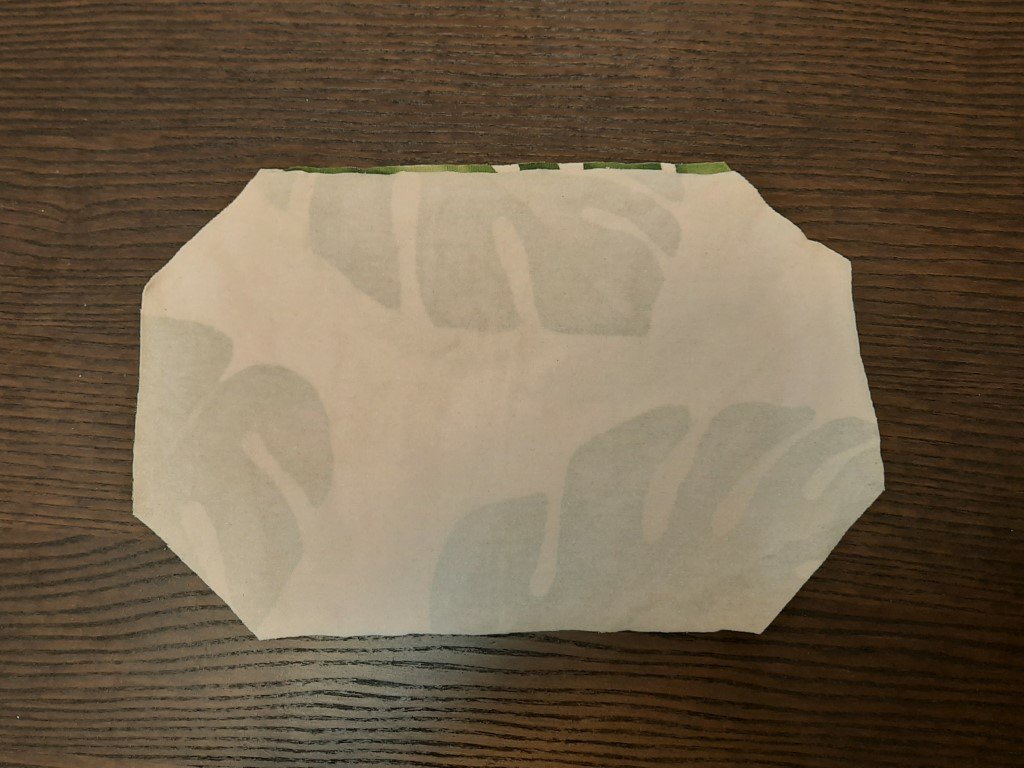
Step 1: Cut 2 layers (you can add more layers for more protective masks).
Step 2: Put the fabric right sides together, sew along the black dashed lines and leave small openings to turn the fabric inside out.
Step 3: Turn the fabric inside out, press to flatten it (if necessary).
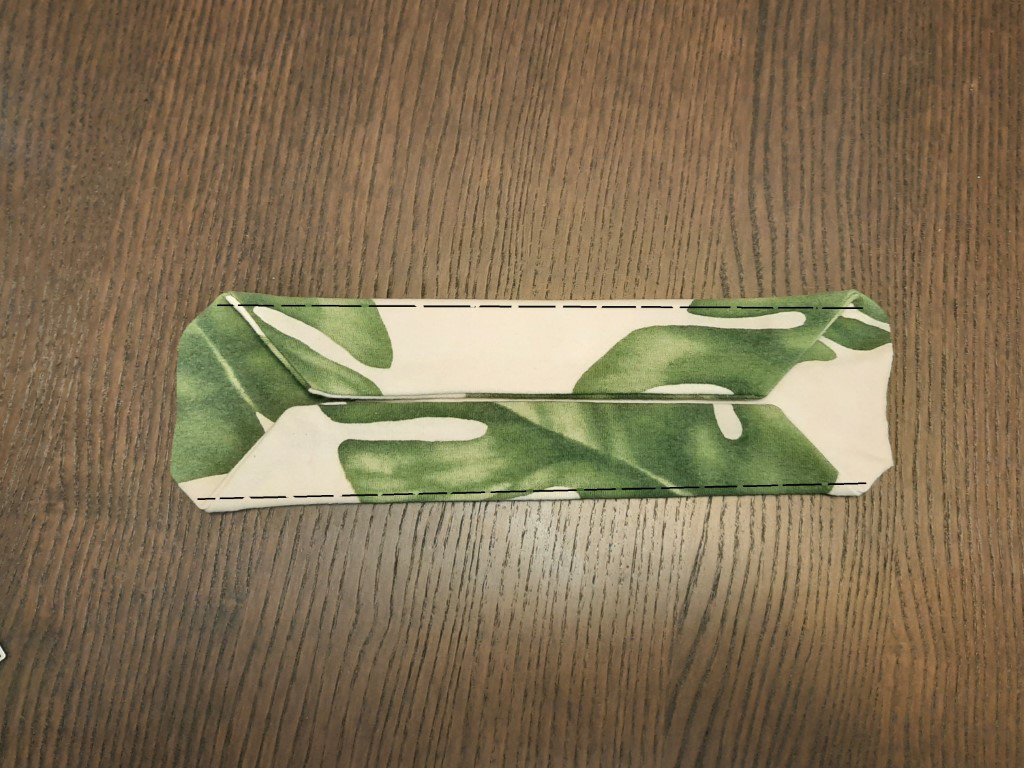
Step 4: Fold the fabric and sew along the two dashed lines.
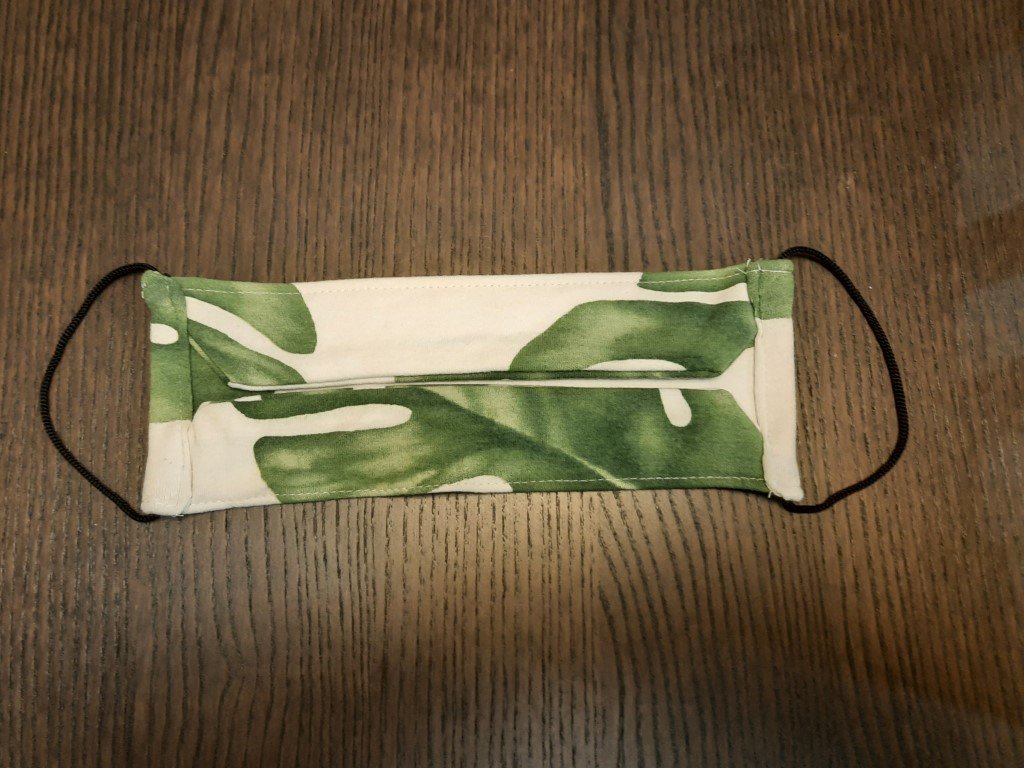
Step 5: Fold one short end twice to hide the raw edge, sew it to make a tube to insert elastic. Repeat with the other side.
Step 6: Thread a 25cm/10in elastic through each tube and tie it. Hide the knot inside the tube. You can adjust the length of the elastic if needed.
Tada! You’ve made it – a really simple and useful mask!
My friend made a bunch of them and really liked this design because it’s easier and faster to make than the previous one.
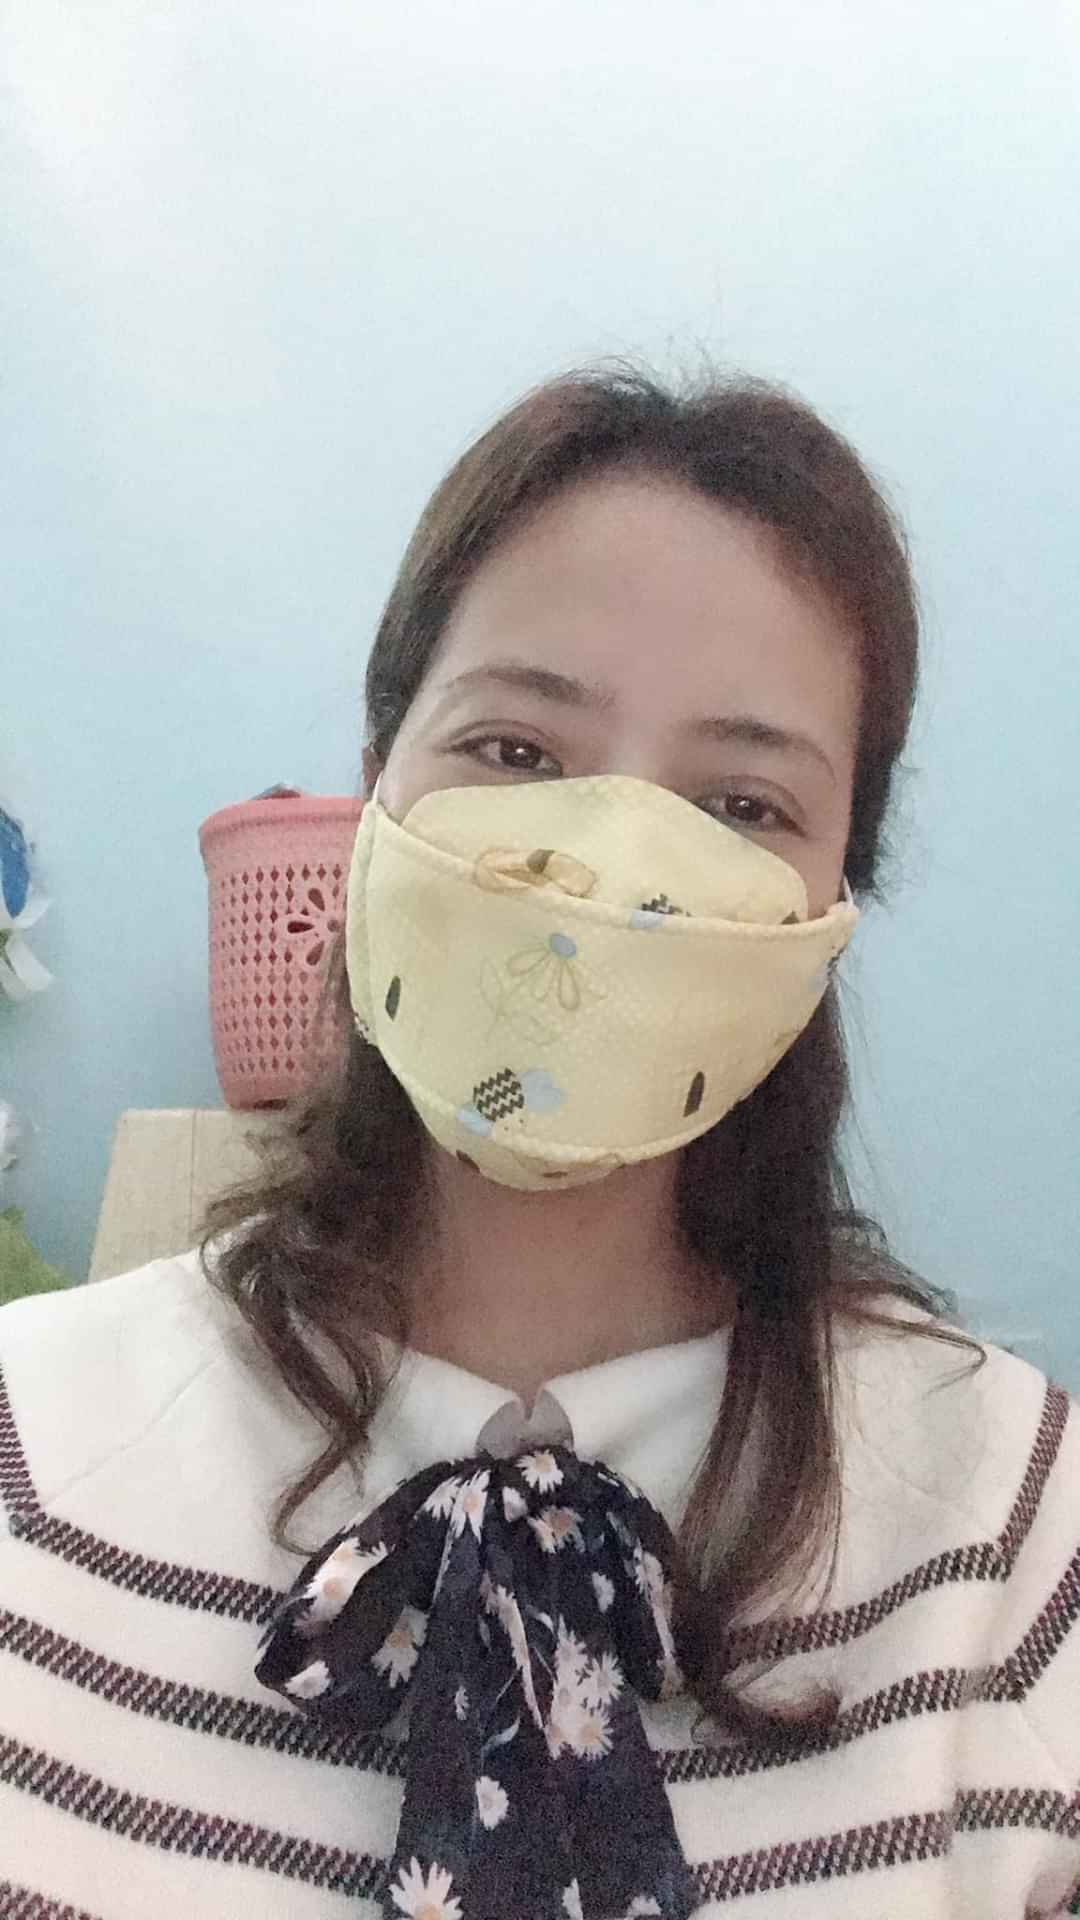
This is how it looks on the face. Well-fitted and quite comfortable.
Hope you guys will love it. Don’t forget that masks cannot 100% protect you from the virus. What you need to do is to refrain from going to crowded places, keep a safe distance from others, and most importantly, WASH YOUR HANDS REGULARLY and DON’T TOUCH YOUR MOUTH, EYES OR NOSE!!!
We all agree that pockets add much of convenience to any garments, don’t we? I love it when I go out not taking along my bag and still have my hands free with the phone in the pocket. Or just put my hands into the pockets when I feel I have nothing to do – or when I feel not very confident. That is why I often sew pockets to my casual dresses. For the formal dresses, I automatically sew it with no pockets – the convenience does not always go along well with luxurious look.
And you may wonder why I do not add pockets to any of the dress patterns I share on my blog. Because you can do it yourself in just minutes! You can choose almost any dress and add this kind of pockets to put your hands and little things. But be careful with dresses with close fit – if you don’t want the pockets to lump up on your garment. I normally would not add inseam pockets onto sheath dresses.
To those who would love to have pockets added to their dresses, this is a really quick tutorial for adding side seam pockets to almost any dress that you are going to sew.
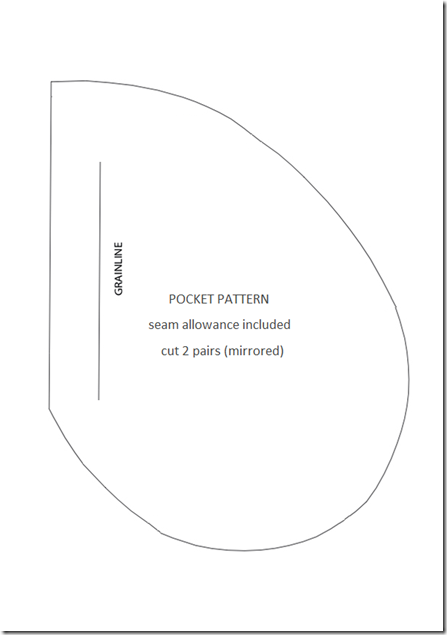
First, download the pocket pattern here and print it on A4 paper, or just draw one yourself, but you need to make sure you can put your hand inside of the pocket. You should also make the opening of the pocket (the straight line in the image) smaller to keep the stuff from falling out of the pockets. Cut out 2 pairs of pocket bag pieces.
Next, snip notches at the side seams of the skirt part of your dress (both front and back) to mark the start of the pockets. For dresses, I recommend you to place the pockets about 3 centimeters/about 1 inch below your natural waist line so you can put your hands in easily. For other garments like jackets, tops or trousers, you will need to check to make sure the pocket placement is good.
Lay the pocket piece flat on the main fabric of your dress right sides together, the top of the pocket aligns with the notch on the main fabric. Pin into place and sew the side seam of the dress and the pocket together. Sew a slightly smaller seam allowance than usual so that when you close the dress seam, the pockets will not be exposed. Repeat with other pocket pieces. Turn the pocket pieces out and press.
Place the front and back pieces of the dress right sides together, pin down the side seams and around the pocket pieces. Then sew the side seams as normal. When you get to the top of the pocket, stitch on 0.5 centimeter and pivot to sew the two pocket pieces together and continue down to the rest of the side seam.
Finish the rest of the dress as usual, and you will have a dress with inseam pockets for extra convenience!