Showing posts with label fit and flare dress. Show all posts

Wednesday, October 2, 2019

Free sewing pattern: Claire dress pattern

After struggling for quite some time, I finally have the Claire dress done (and also the September mission accomplished – 3 days late)!
The Claire dress in my sketch is a button down one, but when making the pattern, I think that this kind of design has too much details and is unfriendly to most of new sewists, so I decided to simplify it a bit – making it without the button placket. So, the final design is as follow:
The principal features of this dress remain unchanged: neckline with ruffled detail, three tiered skirt, with two layers at the second tier and cap sleeves. The dress is a wonderful choice for those who love feminine and modest style.
And let’s see how it looks in 3D simulation:
Beautiful, isn’t it? And also it looks great on larger models:
The pattern is made using layered PDF, please check for your desired size before printing so you won’t waste your paper. If you still do not know how to print a layered PDF, please check for the instruction here.
You can print this using your home printer and A4/Letter paper. I calculated the printing area so that you will be able to use either type of paper to print the pattern out perfectly. Always print the first page first and check with the test square if you are printing at the right scale before you print out the whole pattern.
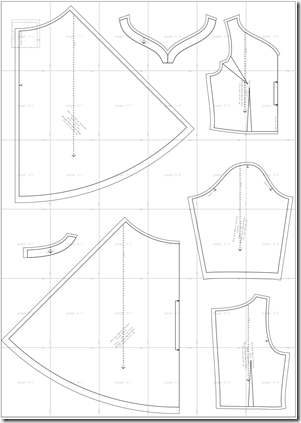
However, because this dress has quite some details, some sewing novices may feel confused when it comes to cutting and attaching the pieces together. Here is how the pattern looks when you cut and tape all the pages together:
You will see there are 10 pattern pieces, to be cut as follows:
A. Front bodice – 1pcs
B. Back bodice – 2pcs
C. Front neck ruffle – 1pcs
D. Back neck ruffle – 2pcs
E. Front skirt – tier 1 – 1pcs
F. Back skirt – tier 1 – 2pcs
G. Skirt – tier 2 inner layer – 2pcs (1 front and 1 back)
H. Skirt – tier 2 outer layer – 2pcs (1 front and 1 back)
I. Skirt – tier 3 – 2pcs (1 front and 1 back)
J. Cap sleeve – 2pcs
It may take you some time to finish this dress because it involves in a lot of gathering, but you won’t be disappointed at the result.
Well, I almost forgot the most important think, the download link! You can download the pattern for free on my website here: https://tianascloset.com/index.php/2019/10/03/claire-tiered-dress-pattern/
Happy sewing,
Tiana

Tuesday, July 16, 2019

Free sewing pattern: Veronica dress

Hi guys,

I guess I should name my patterns, because I just find out that if I just list the features of the garment (like short sleeve, round neck, knee length, etc.), some of them will be really long, or will cause confusion with the same name for different model. So from now on, you will see the pattern with a name, I just name them randomly to my liking.

And the first dress with a name I am sharing today is the Veronica dress.

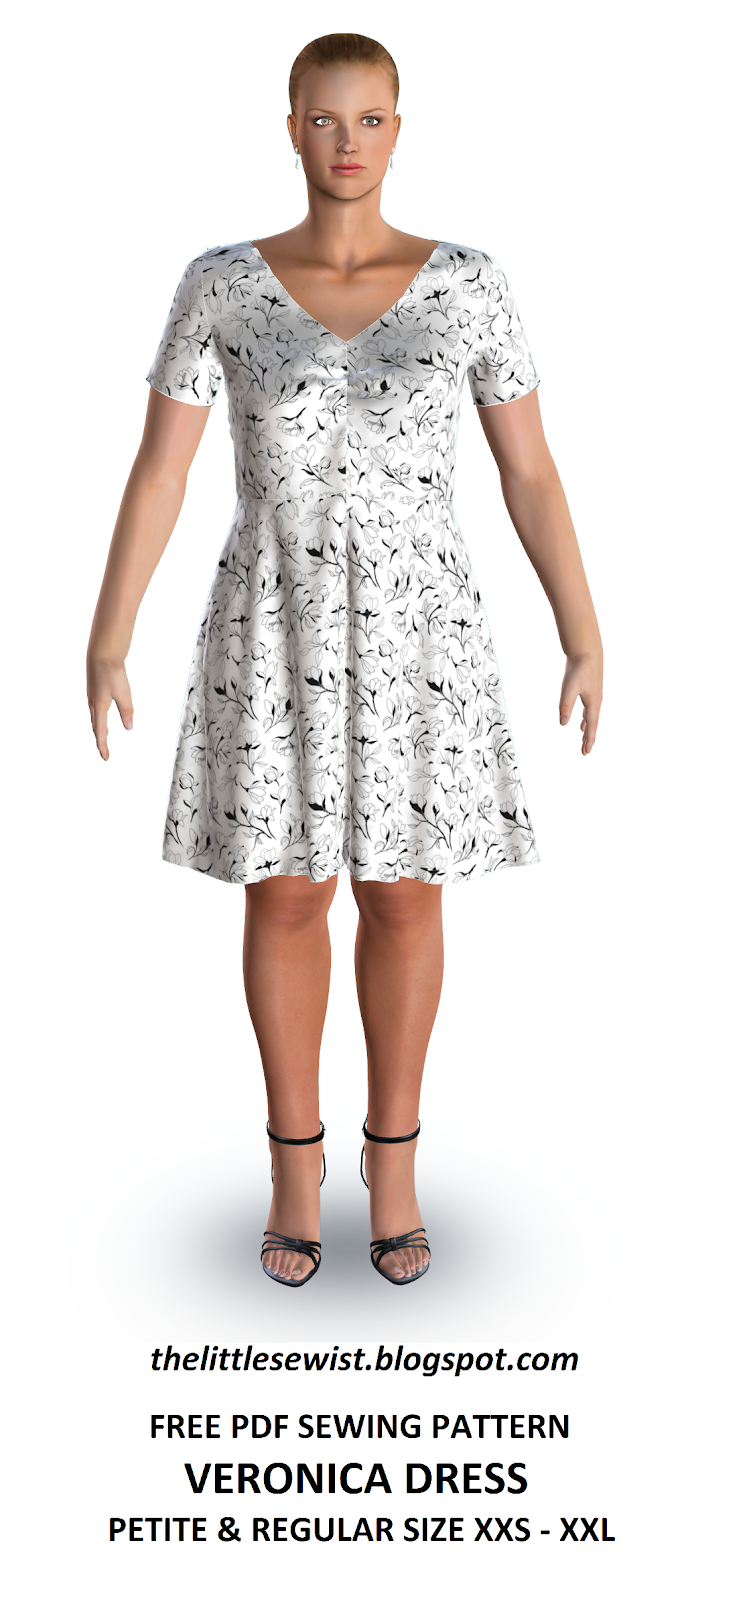
This dress features a deep V neckline, a gathered front, and a flared skirt. It is simple and easy, and it will make you beautiful I'm sure. 

Here is a 3D simulation of the Veronica dress:


 And this is how it looks on a size M model. 

And this is how it looks on a size XXL model. Still adorable, huh? I really love how the fit and flare form flatters the curves of the wearer, no matter what their body shape is.
The pattern is made using layered PDF, please check for your size before printing so you won’t waste your paper. If you still do not know how to print a layered PDF, please check for the instruction here.
You can print this using your home printer and A4/Letter paper. I calculated the printing area so that you will be able to use either type of paper to print the pattern out perfectly. Always print the first page first and check with the test square if you are printing at the right scale before you print out the whole pattern.

Do you want to add side seam pockets to the pattern for additional convenience? Just go ahead because it is too easy, just follow the quick instruction here.

Cutting instruction:

This is how you will get if you print all sizes. Messy, huh? Just print what you need, you won't get confused.


The cutting instruction is for the garment with facings. If you choose to sew it with bias binding, skip the front facing and back facing pieces. If you choose to sew with bodice lining, skip the facing pieces and cut a set of front and back pieces in lining fabric.

A. Front - 2pcs
B. Back - 2pcs
C. Front Skirt - 1pcs
D. Back Skirt - 2pcs
E. Front Facing – 1pcs + Fusible Interfacing – 1pcs
F. Back Facing – 2pcs + Fusible Interfacing – 2pcs


Happy sewing! Remember to show me your masterpiece!

XOXO
Tien the Little Sewist

Friday, September 7, 2018

Round neck short sleeve fit and flare dress pattern

(Scroll down to the end of the post for download links)

I am posting a pattern for a very popular dress that can be seen everywhere – a round neck short sleeve fit and flare dress. It is so basic and still so stylish and feminine that I’m sure any woman would have at least one in her wardrobe.

image

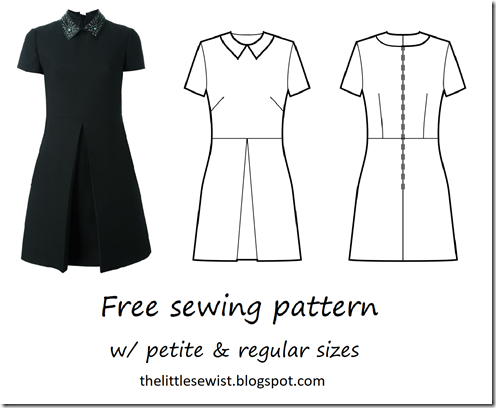
The flared skirt can be a gathered skirt or a pleated skirt. In the image below, this Carolina Herrera dress has a gathered skirt, and the technical drawing shows the pleated skirt. Each will give you a nice dress – the gathered one is more casual (and requires less attention to sew) than the pleated one.

If you are sewing with fairly thick and bodied fabric, I recommend you to use the pleats – they will not bulk up your waist. If you use thin and flowy fabric, any choice is fine.

This pattern is a regular fitting one, with added eases as shown in the table below:

Ease around bust

9.00 cm

3.54 in

Ease around waist

12.00 cm

4.72 in

Ease around hips

10.50 cm

4.09 in

Ease around full hips

7.00 cm

2.76 in

Ease around overarm

12.00 cm

4.72 in

Ease around wrist

12.00 cm

4.72 in

The pattern is created in pdf format using A4 paper. I can also create the pattern in other paper sizes (A0 to A4, Letter, Tabloid), so please inform me if you need them.

Print the patterns on A4 paper at actual size/no scaling/100%. Not sure how to print and cut the patterns? Check the guide here.

Do you want to add side seam pockets to the pattern for additional convenience? Just go ahead because it is too easy, just follow the quick instruction here.

Again, happy sewing! I look forward to seeing your masterpiece!

XOXO

Tiên the Little Sewist

Cutting instruction:

After taping down all the pages following the instruction, the overall layout of the pattern pieces is much like this (the arrangement of pattern pieces will vary a bit with sizes because I want to utilize all space to result in least number of pages):

image

The cutting instruction is for the garment with facings. If you choose to sew it with bias binding, skip the front facing and back facing pieces. If you choose to sew with bodice lining, skip the facing pieces and cut a set of front and back pieces in lining fabric.

A. Front Skirt - 1pcs

B. Back Skirt - 2pcs

C. Sleeve - 2pcs

D. Front - 1pcs

E. Back - 2pcs

F. Front Facing – 1pcs + Fusible Interfacing – 1pcs

G. Back Facing – 2pcs + Fusible Interfacing – 2pcs

Download links for the dress:

Check for your size in the Size Chart before downloading. Not finding your size? Comment your height, bust – waist – hip measurements in the comment box below and I will send you the custom-made pattern for you as soon as I can!

Tuesday, August 21, 2018

Sleeveless slit neck center front pleat skirt dress pattern

(Scroll down to the end of the post for download links)

Hi there,

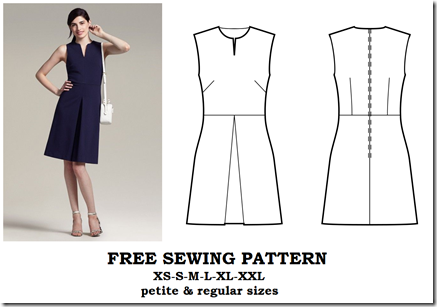
I am posting the pattern for this lovely dress – a simple one that can be worn from day to night, from work to dinner date. It features a slit neckline and a center front pleat skirt. The original dress is a design by MM.LaFleur, a French style fashion brand with a lot of lovely pieces for women who work. I really love their designs, they are simple and practical and suitable for professional environment. And oh how I wish I can establish such a wonderful brand like this, in my country!

image

Of course, all I can do now is dream. I know there are much more to fashion industry than just enthusiasm – you need to know about marketing, PR, you need to understand about finance and business, you need to have capital and you need to have companions. I am just a woman who can make patterns and sew, and having no support from family and friends, but I do wish one day I can get enough money to start a small business in this glamorous industry. Before that, I am happy and content with sharing the patterns with those who love to sew!

Back to the dress I am sharing today, the pattern is created in pdf format using A4 paper. I can also create the pattern in other paper sizes (A0 to A4, Letter, Tabloid), so please inform me if you need them.

Print the patterns on A4 paper at actual size/no scaling/100%. Not sure how to print and cut the patterns? Check the guide here.

Do you want to add side seam pockets to the pattern for additional convenience? Just go ahead because it is too easy, just follow the quick instruction here.

Again, happy sewing! I look forward to seeing your masterpiece!

XOXO

Tiên the Little Sewist

Cutting instruction:

After taping down all the pages following the instruction, the overall layout of the pattern pieces is much like this (the arrangement of pattern pieces will vary a bit with sizes because I want to utilize all space to result in least number of pages):

image

The cutting instruction is for the garment with facings. If you choose to sew it with bias binding, skip the front facing and back facing pieces. If you choose to sew with bodice lining, skip the facing pieces and cut a set of front and back pieces in lining fabric.

A. Front Skirt – 1pcs

B. Back Skirt – 2pcs

C. Front – 1pcs

D. Back - 2pcs

E. Front Facing – 1pcs + Fusible Interfacing – 1pcs

F. Back Facing – 2pcs + Fusible Interfacing – 2pcs

Download links for the dress:

Check for your size in the Size Chart before downloading. Not finding your size? Comment your height, bust – waist – hip measurements in the comment box below and I will send you the custom-made pattern for you as soon as I can!


Thursday, August 16, 2018

Sleeveless 8 panel skirt dress

(Scroll down to the end of the post for download links)

A line shape is a miracle dress shape that is suitable for almost any body type. It flatters your body without too much effort – drawing eyes to the waist of a pear or heart shape bodies, de-emphasizing the hips and adding appearance of sexy curves for those who are too skinny or have a boxy body. I am totally in love with A line dresses and made myself a bunch of them – they do great in balancing my huge breasts and small hips. Whenever I feel uncertain about what to wear, my choice would almost be an A line dress.

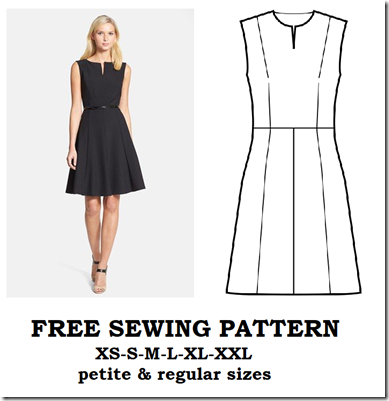
I ran across this beautiful little black dress on Pinterest. It features a slit neck detail and A line knee long 8 panel skirt which is sleek and stylish and can make a nice outfit for many occasions. It can be easily mixed with belts or cardigan for a casual work day, or a day out with your BFFs.

image

The advantage of sewing your own clothes would be that you can sew many dresses with just one pattern. You can make a black dress for work, and a bright floral one for a picnic. It is up to your creativity! That is why I love sewing, and hope to share this hobby with everyone.

The pattern is created in pdf format using A4 paper. I can also create the pattern in other paper sizes (A0 to A4, Letter, Tabloid), so please inform me if you need them.

Print the patterns on A4 paper at actual size/no scaling/100%. Not sure how to print and cut the patterns? Check the guide here.

Do you want to add side seam pockets to the pattern for additional convenience? Just go ahead because it is too easy, just follow the quick instruction here.

Again, happy sewing! I look forward to seeing your masterpiece!

XOXO

Tiên the Little Sewist

Cutting instruction:

After taping down all the pages following the instruction, the overall layout of the pattern pieces is much like this (the arrangement of pattern pieces will vary a bit with sizes because I want to utilize all space to result in least number of pages):

image

The cutting instruction is for the garment with facings. If you choose to sew it with bias binding, skip the front facing and back facing pieces. If you choose to sew with bodice lining, skip the facing pieces and cut a set of front and back pieces in lining fabric.

A. Center Front Skirt – 2pcs

B. Side Front Skirt – 2pcs

C. Center Back Skirt – 2pcs

D. Side Back Skirt – 2pcs

E. Front Bodice - 1pcs

F. Back Bodice - 2pcs

G. Front Facing – 1pcs + Fusible Interfacing – 1pcs

H. Back Facing – 2pcs + Fusible Interfacing – 2pcs

Download links for the dress:

Check for your size in the Size Chart before downloading. Not finding your size? Comment your height, bust – waist – hip measurements in the comment box below and I will send you the custom-made pattern for you as soon as I can!

Monday, August 13, 2018

Tight neckline half circle dress pattern

(Scroll down to the end of the post for download links)

This dress features a tight neckline, short sleeves and below the knee half circle skirt. This dress is so modest and feminine and can be worn to many events, from a day date to meeting parents. It is also easy to mix with accessories like purse and high heels. And of course you can be confident in this dress because this design flatters almost any type of body shape, especially when you have narrow hips just like me – it balances the upper and lower part of your body and gives you an hourglass silhouette.


This dress can be sewn with many types of fabrics – from lace to chiffon to jersey knit. I was so in love with this deep red lace dress on Asos that I found myself a good piece of lace to sew this and wear it to my best friend’s wedding (I have very bad impression with buying clothes online – they look so different on the website). It takes a bit more time to sew with lace because you will need to sew with lining but it is worthwhile – who would not love a beautiful lace dress?

The dress pattern is created in pdf format using A4 paper. I can also create the pattern in other paper sizes (A0 to A4, Letter, Tabloid), so please inform me if you need them.

Print the patterns on A4 paper at actual size/no scaling/100%. Not sure how to print and cut the patterns? Check the guide here.

Do you want to add side seam pockets to the pattern for additional convenience? Just go ahead because it is too easy, just follow the quick instruction here.

Again, happy sewing! I look forward to seeing your masterpiece!
XOXO
Tiên the Little Sewist

Cutting instruction:
After taping down all the pages following the instruction, the overall layout of the pattern pieces is much like this (the arrangement of pattern pieces will vary a bit with sizes because I want to utilize all space to result in least number of pages):


The cutting instruction is for the garment with facings. If you choose to sew it with bias binding, skip the front facing and back facing pieces. If you choose to sew with bodice lining, skip the facing pieces and cut a set of front and back pieces in lining fabric.

A. Front Skirt - 1pcs
B. Back Skirt - 2pcs
C. Sleeve - 2pcs
D. Front - 1pcs
E. Back - 2pcs
F. Front Facing – 1pcs + Fusible Interfacing – 1pcs
G. Back Facing – 2pcs + Fusible Interfacing – 2pcs

Download links for the dress:

Check for your size in the Size Chart before downloading. Not finding your size? Comment your height, bust – waist – hip measurements in the comment box below and I will send you the custom-made pattern for you as soon as I can!


Tuesday, August 7, 2018

Simple A line dress

(Scroll down to the end of the post for download links)

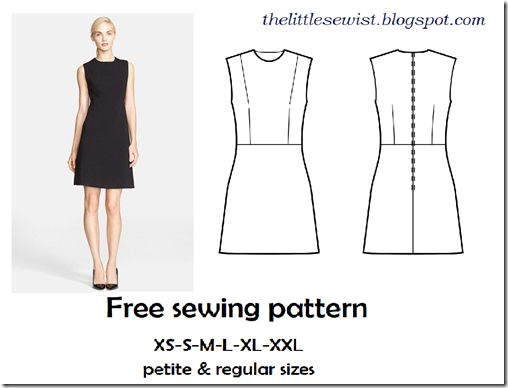
Do you think this little black dress is cute? I am in love with this simple and sleek design, and decided to share this pattern with you. This dress features a tight round neckline, above the knee length and sleeveless design. And I think that even when you make this dress with different colors and prints, it will still be a nice and simple piece to choose when you are tired of opening the full wardrobe and finding it hard to choose what to wear.

image

I made myself a little black dress with this pattern, and I chose to make it with bodice lining instead of facing. I always think that using lining makes the dress more high-class, just like how the high end fashion brands always do with their designs.

You will find sewing with lining takes you just a little more time than sewing with interfacing. I will not talk about how to sew with lining because you can easily find them on the Internet. One small tip for sewing clean lining to the main fabric: Cut the seam allowance of the lining 0.5 centimeter smaller than the main fabric pieces, so that when you sew them together, the main fabric will roll inside and the lining will not be shown.

The pattern is created in pdf format using A4 paper. I can also create the pattern in other paper sizes (A0 to A4, Letter, Tabloid), so please inform me if you need them.

Print the patterns on A4 paper at actual size/no scaling/100%. Not sure how to print and cut the patterns? Check the guide here.

Do you want to add side seam pockets to the pattern for additional convenience? Just go ahead because it is too easy, just follow the quick instruction here.

Again, happy sewing! I look forward to seeing your masterpiece!

XOXO

Tiên the Little Sewist

Cutting instruction:

After taping down all the pages following the instruction, the overall layout of the pattern pieces is much like this (the arrangement of pattern pieces will vary a bit with sizes because I want to utilize all space to result in least number of pages):

The cutting instruction is for the garment with facings. If you choose to sew it with bias binding, skip the front facing and back facing pieces. If you choose to sew with bodice lining, skip the facing pieces and cut a set of front and back pieces in lining fabric.

A. Front Skirt - 1pcs

B. Back Skirt - 2pcs

C. Front Bodice - 1pcs

D. Back Bodice - 2pcs

E. Front Facing – 1pcs + Fusible Interfacing – 1pcs

F. Back Facing – 2pcs + Fusible Interfacing – 2pcs

Download links for the dress:

Check for your size in the Size Chart before downloading. Not finding your size? Comment your height, bust – waist – hip measurements in the comment box below and I will send you the custom-made pattern for you as soon as I can!

Petite XS

Regular XS

Petite S

Regular S

Petite M

Regular M

Petite L

Regular L

Petite XL

Regular XL

Petite XXL

Regular XXL

Wednesday, August 1, 2018

Sweetheart neckline flared dress pattern

This feminine dress features a sweetheart neckline, half sleeves and below the knee length. I personally think black is a bit too gloomy for such a beautiful piece, so I decided to make it in florals. I am going to post it as soon as I finish the garment.

image

The pattern is created in pdf format using A4 paper. I can also create the pattern in other paper sizes (A0 to A4, Letter, Tabloid), so please inform me if you need them.

Print the patterns on A4 paper at actual size/no scaling/100%. Not sure how to print and cut the patterns? Check the guide here.

Do you want to add side seam pockets to the pattern for additional convenience? Just go ahead because it is too easy, just follow the quick instruction here.

Again, happy sewing! I look forward to seeing your masterpiece!

XOXO

Tiên the Little Sewist

Cutting instruction:

After taping down all the pages following the instruction, the overall layout of the pattern pieces is much like this (the arrangement of pattern pieces will vary a bit with sizes because I want to utilize all space to result in least number of pages):

image

The cutting instruction is for the garment with facings. If you choose to sew it with bias binding, skip the front facing and back facing pieces. If you choose to sew with bodice lining, skip the facing pieces and cut a set of front and back pieces in lining fabric.

A. Front Skirt - 1pcs

B. Back Skirt - 2pcs

C. Sleeve - 2pcs

D. Front - 1pcs

E. Back - 2pcs

F. Front Facing – 1pcs + Fusible Interfacing – 1pcs

G. Back Facing – 2pcs + Fusible Interfacing – 2pcs

Download links for the dress:

Check for your size in the Size Chart before downloading. Not finding your size? Comment your height, bust – waist – hip measurements in the comment box below and I will send you the custom-made pattern for you as soon as I can!

Petite XS

Regular XS

Petite S

Regular S

Petite M

Regular M

Petite L

Regular L

Petite XL

Regular XL

Petite XXL

Regular XXL

Thursday, July 26, 2018

Round neck A line dress pattern

(Scroll down to the end of the post for download links)

Do you love looking sweet and feminine? Make this midi A line dress with light weight fabric and you will be happy with it! It brings about the vintage feeling, doesn’t it?

1_2_260_231_230_258_252_472_473_315_314_257_261_262_190_209_270_203_222_269_286_285_technical_drawing

This dress features a modest round neckline, midi length and long sleeve. But don’t worry, you won’t look frumpy at all. Choose a soft and flowy fabric, and it will flatter your figure. You know, nothing can make you look better than an A line dress – a style that hides all kinds of flaws, from big belly to ugly legs. I am a curvy petite myself, and I just love A line dresses!  I always thought that with my height I could never look good in a flared midi dress, but this nice dress changed it. I made it with moderate flare and it did not undermine my height at all! Of course, I wear this dress with high heels – not flats. If you are tall, congrats, you can wear this dress with either flats or heels and still look great.

And if you find the length of the dress unflattering, just feel free to lengthen or shorten it to your taste. It’s always worthy to try.

This baby is suitable for cooler days at the beginning of fall, and of course, for an evening date. I even made one to wear in the super hot mid summer of the Southern Vietnam – it helps me cover my skin under the scorching sun!

The pattern is created in pdf format using A4 paper. I can also create the pattern in other paper sizes (A0 to A4, Letter, Tabloid), so please inform me if you need them.

Print the patterns on A4 paper at actual size/no scaling/100%. Not sure how to print and cut the patterns? Check the guide here.

Do you want to add side seam pockets to the pattern for additional convenience? Just go ahead because it is too easy, just follow the quick instruction here.

Again, happy sewing! I look forward to seeing your masterpiece!

XOXO

Tiên the Little Sewist

Cutting instruction:

The cutting instruction is for the garment with facings. If you choose to sew it with bias binding, skip the front facing and back facing pieces. If you choose to sew with bodice lining, skip the facing pieces and cut a set of front and back pieces in lining fabric.

A. Front Skirt - 1pcs

B. Back Skirt - 2pcs

C. Sleeve - 2pcs

D. Front - 1pcs

E. Back - 2pcs

F. Front Facing – 1pcs + Fusible Interfacing – 1pcs

G. Back Facing – 2pcs + Fusible Interfacing – 2pcs

Download links for the dress:

Check for your size in the Size Chart before downloading. Not finding your size? Comment your height, bust – waist – hip measurements in the comment box below and I will send you the custom-made pattern for you as soon as I can!


Saturday, July 21, 2018

Round neck long sleeve pleated dress

(Scroll down to the end of the post for download links)

This pattern is inspired by a dress by Carolina Herrera ( you know, I am obsessed with the design by Carolina Herrera!). It features a 5/8 length sleeve, round neck and knee long box pleated skirt. Although I am not very much into the striped design (because I am short and curvy, horizontal stripes make me shorter and fatter), I think this dress would be nice in almost any color and print. This design is also very versatile. You can either make it with soft and flowy fabric or with stiff and heavy fabric – it will create different feelings to the wearer and the watchers! Just try on and you will love it just like I do!

image

If you want to make the dress with striped fabric, remember to align the stripes at the seams. You don’t want to ruin the dress by not be careful enough to match the stripe together – it will make the dress look cheap. It is also one of the reasons I do not buy ready made clothes at the stores, the stripes are almost always skewed.

The pattern is created in pdf format using A4 paper. I can also create the pattern in other paper sizes (A0 to A4, Letter, Tabloid), so please inform me if you need them.

Print the patterns on A4 paper at actual size/no scaling/100%. Not sure how to print and cut the patterns? Check the guide here.

Do you want to add side seam pockets to the pattern for additional convenience? Just go ahead because it is too easy, just follow the quick instruction here.

Again, happy sewing! I look forward to seeing your masterpiece!

XOXO

Tiên the Little Sewist

Cutting instruction:

The cutting instruction is for the garment with facings. If you choose to sew it with bias binding, skip the front facing and back facing pieces. If you choose to sew with bodice lining, skip the facing pieces and cut a set of front and back pieces in lining fabric.

A. Front Skirt - 1pcs

B. Back Skirt - 2pcs

C. Sleeve - 2pcs

D. Front - 1pcs

E. Back - 2pcs

F. Front Facing - 1pcs

G. Back Facing - 2pcs

Download links for the dress:

Check for your size in the Size Chart before downloading. Not finding your size? Comment your height, bust – waist – hip measurements in the comment box below and I will send you the custom-made pattern for you as soon as I can!

Wednesday, July 18, 2018

Notched Peter Pan collar center pleat dress pattern

(Scroll down to the end of the post for download links)

I am sharing this baby when I come over a girl on the street in a dress similar to this. She looked so young and lovely in this dress that I immediately decided to make one for myself. This dress features a notched Peter Pan collar, center front pleat and short sleeves and is yet another simple one to sew.

I really like the embellished collar, it adds a nice accent to the simple dress to make it more interesting and eye-catching. If I have time (I guess it will be in a few years) I will try making one for myself. For now, I should be happy with using a printed fabric to make the collar.

image

The pattern is created in pdf format using A4 paper. I can also create the pattern in other paper sizes (A0 to A4, Letter, Tabloid), so please inform me if you need them.

Print the patterns on A4 paper at actual size/no scaling/100%. Not sure how to print and cut the patterns? Check the guide here.

Do you want to add side seam pockets to the pattern for additional convenience? Just go ahead because it is too easy, just follow the quick instruction here.

Again, happy sewing! I look forward to seeing your masterpiece!

XOXO

Tiên the Little Sewist

Cutting instruction:

After taping down all the pages following the instruction, the overall layout of the pattern pieces is much like this (the arrangement of pattern pieces will vary a bit with sizes because I want to utilize all space to result in least pages):

image

The cutting instruction is for the garment with facings. If you choose to sew it with bias binding, skip the front facing and back facing pieces. If you choose to sew with bodice lining, skip the facing pieces and cut a set of front and back pieces in lining fabric.

A. Front Skirt - 1pcs

B. Back Skirt - 2pcs

C. Sleeve - 2pcs

D. Front - 1pcs

E. Back - 2pcs

F. Peter Pan Collar- 4pcs

Download links for the dress:

Check for your size in the Size Chart before downloading. Not finding your size? Comment your height, bust – waist – hip measurements in the comment box below and I will send you the custom-made pattern for you as soon as I can!

Wednesday, June 20, 2018

V neck half sleeve full circle dress pattern


(Scroll down for download links)

Playing the song “Red” by MAGIC! (I love this song!)

I said hey you with the red dress on
I gotta find a way to take it off
I got a lot of love and it's growing strong
When I see you with your red dress on

Red dress! I love red dresses! And I totally agree with the saying: “When in doubt, wear red” by Bill Blass. I am so in love with the bright and sexy color which makes all kind of styles so stylish. According to what I read about color theory, red color means energy, passion, love and power – an emotionally intense color. Red attire has distinct effect on both the wearers and people who see them. Red color makes the wearer more confident and happy, so choose a red piece when you feel down, and you will see your mood improved!


The pattern I am sharing today is inspired by a red dress I accidentally came upon when surfing Pinterest. The plus size model in this red midi dress looks totally stunning! A deep V neckline and a flirty full circle skirt make the dress a totally head-turner, even with the simplest or no acessories. And even better, this dress can magically flatter most types of body shape and turn them into almost hourglass shape!

I immediately decided to make myself a similar dress like this one! But I am not so confident to choose the bright red color, so I chose a darker shade – burgundy.

Of course, if red color is not your taste, you can choose a different color, like dark red, deep blue or dark green, etc. Just the shape of the dress is enough to make you stand out in the party.

The pattern is created in pdf format using A4 paper. I can also create the pattern in other paper sizes (A0 to A4, Letter, Tabloid), so please inform me if you need them.

Not sure how to print and cut the patterns? Check the guide here.

Again, happy sewing! I look forward to seeing your masterpiece!
XOXO
Tiên the Little Sewist

Download links for the V neck half sleeve full circle dress:

Check for your size in the Size Chart before downloading. Not finding your size? Comment your height, bust – waist – hip measurements in the comment box below and I will send you the custom-made pattern for you!


Instruction for cutting:

If you make this dress with lined bodice:
A. Front Bodice - 1pcs shell fabric + 1pcs lining fabric
B. Back Bodice - 2pcs shell fabric + 2pcs lining fabric
C. Front Skirt - 1pcs
D. Back Skirt - 2pcs
E. Sleeve - 2pcs

If you make this dress with interfacing:
A. Front Skirt - 1pcs
B. Back Skirt - 2pcs
C. Front Bodice - 1pcs
D. Back Bodice - 2pcs
E. Front Facing - 1pcs + Front Interfacing – 1pcs
F. Back Facing - 2pcs + Back Interfacing – 2pcs
G. Sleeve - 2pcs