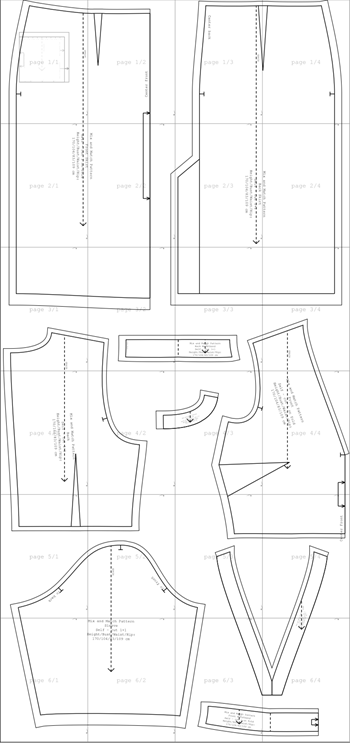
Showing posts with label half sleeve. Show all posts

Thursday, October 10, 2019

Free sewing pattern: Ruby saree blouse pattern

I am so happy to know that my blog is reaching people! Yesterday a beloved reader from India asked me to make her a saree pattern – and I am more than happy to do so! And the result is the Ruby saree pattern that I am sharing today!
This Ruby saree features a bateau neckline, princess seam and half sleeves. It has a very close fit – just like how you see all other saree blouses on the Internet. At first, the Indian friend told me that my Amy crop top did not work well and did not fit properly when she altered it to make the saree blouse in her first attempt. I understand that, the Amy crop top falls at the natural waistline while the saree blouse stops above that level, so the fit is not the same.
The Ruby saree blouse pattern is made by her request, and I am happy to share it with others. Let’s see how it looks in 3D simulation:
Can you see the very beautiful seam line? I really love princess seam, because it hugs the curves so well.
Of course this is just the very basic simulation. In real life, you can add more details to make the saree blouse look better. For example, a line of buttons can be a nice addition to the back of the item.
And because my beloved reader asked me to make the pattern in sizes so that she can make more sarees for her family members, I graded it up to size 5XL. Here’s how it looks on my size 5XL model:
You can also try this pattern on various fabrics and prints. I am so in love with this beautiful pattern!
The pattern is made using layered PDF, please check for your desired size before printing so you won’t waste your paper. If you still do not know how to print a layered PDF, please check for the instruction here.
You can print this using your home printer and A4/Letter paper. I calculated the printing area so that you will be able to use either type of paper to print the pattern out perfectly. Always print the first page first and check with the test square if you are printing at the right scale before you print out the whole pattern.
This is the link to download this pattern: Ruby saree blouse

Sunday, September 29, 2019

Amy bat-wing top pattern

This is yet another item in the September collection – I am sooo behind schedule with the Claire dress not done yet. Next month I will be even busier than this month, and I think I won’t have much time to invest in pattern making that I am addicted to.
OK, enough with whining. I am introducing the Amy bat-wing top pattern, which is initially sketched with the Sarah skirt.
And this is it in 3D simulation. I am really happy with the way it turns out to be in reality:
Do you think that this pattern is quite versatile? You can make it with thin or thick fabric, and the prints are all up to you!
This Amy top pattern is created in layered PDF format.
The pattern is made using layered PDF, please check for your desired size before printing so you won’t waste your paper. If you still do not know how to print a layered PDF, please check for the instruction here.
You can print this using your home printer and A4/Letter paper. I calculated the printing area so that you will be able to use either type of paper to print the pattern out perfectly. Always print the first page first and check with the test square if you are printing at the right scale before you print out the whole pattern.
Cutting instruction:
After taping down all the pages following the instruction, the pattern pieces will look like this:
There are 5 pattern pieces to be cut as follows:
A. Front – 1pcs
B. Back – 1pcs
C. Cuff – 2pcs
D. Front facing – 1pcs + Fusible interfacing – 1pcs
E. Back facing – 1pcs + Fusible interfacing – 1pcs
You can replace Front facing and Back facing with bias tape. I recommend you to use bias tape when you choose knit fabric, it will help you to get a more secure and flatter neckline.
And this is the download link on my official website: https://tianascloset.com/index.php/2019/09/30/amy-bat-wing-top-pattern/

Friday, August 16, 2019

Simple sewing pattern: Edith loose fitting midi dress

Well, I found out that the posts that have been viewed the most times on my blog are those sharing simple patterns. I guess many of my readers are newbies, or just too busy to have time to invest in a sophisticated projects. Even I sometimes feel too lazy to cut and sew too many details - so I often opt for simple pieces of garment, which do not take more than 2 hours to finish.

So today it is going to be a simple dress: a drop shoulder loose fitting midi dress, which is great for a lazy day. See how it looks in 3D simulation? Do you think it will be nice for a picnic in the park? Or even for a fall wedding (if made with luxurious fabric)?


Here is how it looks on the model (she is wearing size M):

I even made a simulation for orange color:

The pattern is made using layered PDF, please check for your size before printing so you won’t waste your paper. If you still do not know how to print a layered PDF, please check for the instruction here.
You can print this using your home printer and A4/Letter paper. I calculated the printing area so that you will be able to use either type of paper to print the pattern out perfectly. Always print the first page first and check with the test square if you are printing at the right scale before you print out the whole pattern.

Do you want to add side seam pockets to the pattern for additional convenience? Just go ahead because it is too easy, just follow the quick instruction here.

Cutting instruction:

After taping down all the pages following the instruction, the overall layout of the pattern pieces is like this:


The cutting instruction is for the garment with facings. If you choose to sew it with bias binding, skip the front facing and back facing pieces. If you choose to sew with bodice lining, skip the facing pieces and cut a set of front and back pieces in lining fabric.

A. Front - 1pcs
B. Back - 2pcs
C. Sleeve -  2pcs
D. Front Facing – 1pcs + Fusible Interfacing – 1pcs
E. Back Facing – 1pcs + Fusible Interfacing – 1pcs

This is the link to download this pattern: Edith loose fitting midi dress (size XXS - XXL)

Happy sewing!
Tien the Little Sewist

Wednesday, August 14, 2019

Free sewing pattern: Chiara puffed sleeve mini dress


I just found out a piece of dress that I really like: a hot pink Chiara Boni dress. It features a simple A line silhouette - but has puffed lace sleeve to make it look special. So I think I will make one for myself - and I share it with you today. 

It is really easy to make, and the result? Just look how nice it is in the lookbook:


And here is my version of the dress - in 3D simulation:


What do you think about this? Nice for a day out, right?

The pattern is made using layered PDF, please check for your size before printing so you won’t waste your paper. If you still do not know how to print a layered PDF, please check for the instruction here. You can print this using your home printer and A4/Letter paper. I calculated the printing area so that you will be able to use either type of paper to print the pattern out perfectly. Always print the first page first and check with the test square if you are printing at the right scale before you print out the whole pattern.

Do you want to add side seam pockets to the pattern for additional convenience? Just go ahead because it is too easy, just follow the quick instruction here.

Cutting instruction:

After taping down all the pages following the instruction, the overall layout of the pattern pieces is like this (this is how it looks when you print all sizes - choose just your size for a less messy look):


The cutting instruction is for the garment with facings. If you choose to sew it with bias binding, skip the front facing and back facing pieces. If you choose to sew with bodice lining, skip the facing pieces and cut a set of front and back pieces in lining fabric.

A. Front - 1pcs
B. Back - 2pcs
C. Sleeve - Upper Part - 2pcs
D. Sleeve - Lower Part - 2pcs
E. Cuff - 2pcs
F. Front Facing – 1pcs + Fusible Interfacing – 1pcs
G. Back Facing – 1pcs + Fusible Interfacing – 1pcs

This is the link to download this pattern: Chiara puffed sleeve mini dress (size XXS - XXL)

Happy sewing!
Tien the Little Sewist

Monday, July 15, 2019

Free sewing pattern: Half sleeve drop waist dress


I am sharing the pattern for the drop waist dress that I made 3D simulation yesterday. I am going to print it and sew it, so just wait for my dress in real life!

This dress features a loose fit, an over the knee length, a round neck and half sleeves. It is simple and yet still elegant enough for a work day or a date night. Make it with soft flowy fabric for a flirty feminine feel.


For the sake of making it as simple as possible for newbies, I discarded the back zipper. If you want to add a back zipper, add a 1.5 centimeters or 5/8 inch seam allowance to the back piece and cut 2 of them.

The pattern is made using layered PDF, please check for your size before printing so you won’t waste your paper. If you still do not know how to print a layered PDF, please check for the instruction here.

You can print this using your home printer and A4/Letter paper. I calculated the printing area so that you will be able to use either type of paper to print the pattern out perfectly. Always print the first page first and check with the test square if you are printing at the right scale before you print out the whole pattern.

Do you want to add side seam pockets to the pattern for additional convenience? Just go ahead because it is too easy, just follow the quick instruction here.

Cutting instruction:

After taping down all the pages following the instruction, the overall layout of the pattern pieces is like this:


The cutting instruction is for the garment with facings. If you choose to sew it with bias binding, skip the front facing and back facing pieces. If you choose to sew with bodice lining, skip the facing pieces and cut a set of front and back pieces in lining fabric.

A. Front - 1pcs
B. Back - 1pcs
C. Front Flounce - 1pcs
D. Back Flounce - 1pcs
E. Front Facing – 1pcs + Fusible Interfacing – 1pcs
F. Back Facing – 1pcs + Fusible Interfacing – 1pcs

This is the link to download this pattern: Half sleeve drop waist dress (size XXS - XXL)

Happy sewing!
Tien the Little Sewist

Friday, August 31, 2018

Modest work dress

(Scroll down to the end of the post for download links)

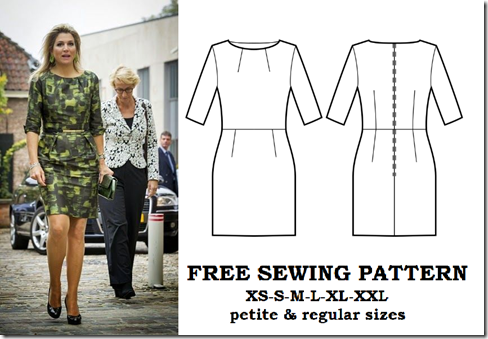
The pattern today is a design similar to the dress worn by Queen Maxima of the Netherlands. It is another dress suitable for work settings. It has all front darts moved to the neckline and made into pleats. The darts at the waist are also made into pleats.

Untitled

This pattern is a regular fitting one, with added eases as shown in the table below:

Ease around bust

9.00 cm

3.54 in

Ease around waist

12.00 cm

4.72 in

Ease around hips

10.50 cm

4.09 in

Ease around full hips

7.00 cm

2.76 in

Ease around overarm

12.00 cm

4.72 in

Ease around wrist

12.00 cm

4.72 in

The pattern is created in pdf format using A4 paper. I can also create the pattern in other paper sizes (A0 to A4, Letter, Tabloid), so please inform me if you need them.

Print the patterns on A4 paper at actual size/no scaling/100%. Not sure how to print and cut the patterns? Check the guide here.

Do you want to add side seam pockets to the pattern for additional convenience? Just go ahead because it is too easy, just follow the quick instruction here.

Again, happy sewing! I look forward to seeing your masterpiece!

XOXO

Tiên the Little Sewist

Cutting instruction:

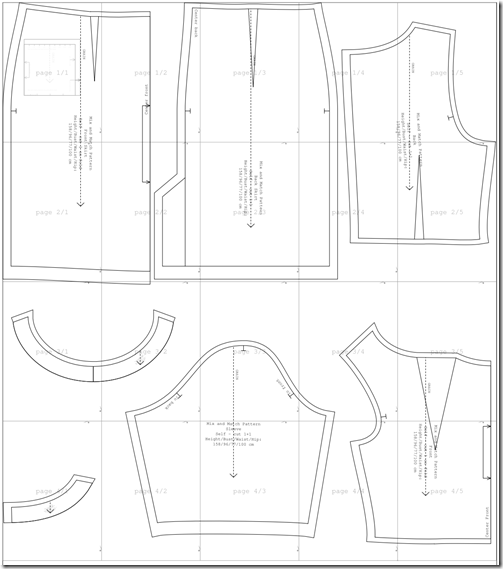
After taping down all the pages following the instruction, the overall layout of the pattern pieces is much like this (the arrangement of pattern pieces will vary a bit with sizes because I want to utilize all space to result in least number of pages):

image

The cutting instruction is for the garment with facings. If you choose to sew it with bias binding, skip the front facing and back facing pieces. If you choose to sew with bodice lining, skip the facing pieces and cut a set of front and back pieces in lining fabric.

A. Front Skirt - 1pcs

B. Back Skirt - 2pcs

C. Sleeve - 2pcs

D. Front - 1pcs

E. Back - 2pcs

F. Front Facing – 1pcs + Fusible Interfacing – 1pcs

G. Back Facing – 2pcs + Fusible Interfacing – 2pcs

Download links for the dress:

Check for your size in the Size Chart before downloading. Not finding your size? Comment your height, bust – waist – hip measurements in the comment box below and I will send you the custom-made pattern for you as soon as I can!

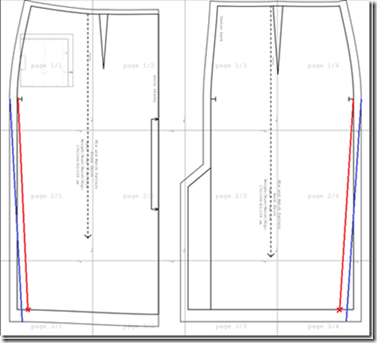
The dress pattern I share in this post has a straight skirt. If you prefer a pencil design, narrow down the side seams, starting from the fullest part of the hip (marked with notches) down to hemline. It is a really quick modification, mark a point at the hemline at the desired width of skirt hemline and draw a straight line from the hip notch to the marked point. Then redraw the seam allowance and cut the pieces. It is similar to the demonstration below – the red lines are new side lines, the blue lines are new seam allowance lines.

image

Sunday, August 19, 2018

Deep sweetheart neckline sheath dress

(Scroll down to the end of the post for download links)

Hi there,

Let’s take a look at today’s dress pattern. Do you think that this darling is somewhat vintage looking? And it also looks like a lot of high-street fashion. If you do not believe me, just visit nordstrom.com, theoutnet.com, etc. to see the brands like Victoria Beckham, Roland Mouret, Stella McCartney or Michael Kors – you will find a lot of similar designs.

image

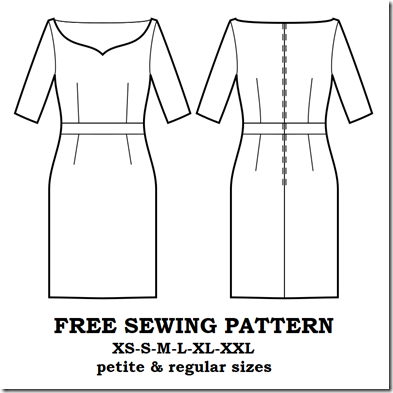
This dress features a deep sweetheart neckline, half sleeve and below the knee length. It is suitable for special events, so choose a luxury fabric to make it look classy and elegant. You will definitely feel confident in this dress!

The dress pattern I share in this post has a straight skirt. If you prefer a pencil design, narrow down the side seams, starting from the fullest part of the hip (marked with notches) down to hemline. It is a really quick modification, mark a point at the hemline at the desired width of skirt hemline and draw a straight line from the hip notch to the marked point. Then redraw the seam allowance and cut the pieces. It is similar to the demonstration below – the red lines are new side lines, the blue lines are new seam allowance lines.

image

And because this is going to be a high-class dress, I recommend that it be made with full lining or bodice lining. Be patient and extra careful when you sew the neckline – it will affect the whole look.
The pattern is created in pdf format using A4 paper. I can also create the pattern in other paper sizes (A0 to A4, Letter, Tabloid), so please inform me if you need them.

Print the patterns on A4 paper at actual size/no scaling/100%. Not sure how to print and cut the patterns? Check the guide here.

Do you want to add side seam pockets to the pattern for additional convenience? Just go ahead because it is too easy, just follow the quick instruction here.

Again, happy sewing! I look forward to seeing your masterpiece!
XOXO
Tiên the Little Sewist

Cutting instruction:

After taping down all the pages following the instruction, the overall layout of the pattern pieces is much like this (the arrangement of pattern pieces will vary a bit with sizes because I want to utilize all space to result in least number of pages):

image

A. Front Skirt - 1pcs
B. Back Skirt - 2pcs
C. Sleeve - 2pcs
D. Front – 1pcs + Lining – 1pcs
E. Back – 2pcs + Lining – 2pcs
F. Front Waistband – 1pcs
G. Back Waistband – 2pcs

Download links for the dress:

Check for your size in the Size Chart before downloading. Not finding your size? Comment your height, bust – waist – hip measurements in the comment box below and I will send you the custom-made pattern for you as soon as I can!

Wednesday, August 1, 2018

Sweetheart neckline flared dress pattern

This feminine dress features a sweetheart neckline, half sleeves and below the knee length. I personally think black is a bit too gloomy for such a beautiful piece, so I decided to make it in florals. I am going to post it as soon as I finish the garment.

image

The pattern is created in pdf format using A4 paper. I can also create the pattern in other paper sizes (A0 to A4, Letter, Tabloid), so please inform me if you need them.

Print the patterns on A4 paper at actual size/no scaling/100%. Not sure how to print and cut the patterns? Check the guide here.

Do you want to add side seam pockets to the pattern for additional convenience? Just go ahead because it is too easy, just follow the quick instruction here.

Again, happy sewing! I look forward to seeing your masterpiece!

XOXO

Tiên the Little Sewist

Cutting instruction:

After taping down all the pages following the instruction, the overall layout of the pattern pieces is much like this (the arrangement of pattern pieces will vary a bit with sizes because I want to utilize all space to result in least number of pages):

image

The cutting instruction is for the garment with facings. If you choose to sew it with bias binding, skip the front facing and back facing pieces. If you choose to sew with bodice lining, skip the facing pieces and cut a set of front and back pieces in lining fabric.

A. Front Skirt - 1pcs

B. Back Skirt - 2pcs

C. Sleeve - 2pcs

D. Front - 1pcs

E. Back - 2pcs

F. Front Facing – 1pcs + Fusible Interfacing – 1pcs

G. Back Facing – 2pcs + Fusible Interfacing – 2pcs

Download links for the dress:

Check for your size in the Size Chart before downloading. Not finding your size? Comment your height, bust – waist – hip measurements in the comment box below and I will send you the custom-made pattern for you as soon as I can!

Petite XS

Regular XS

Petite S

Regular S

Petite M

Regular M

Petite L

Regular L

Petite XL

Regular XL

Petite XXL

Regular XXL

Monday, July 2, 2018

V neck sheath dress with contrast waistband

(Scroll down for download links)

This dress is inspired by the Victoria Beckham sheath dress. It features a below a deep V neckline, knee length and contrast waistband. This dress is amazingly classic and versatile, and I can imagine wearing it to many kinds of events, from professional setting to an extra-curricular event where all the guests need to wear something classic and dressy. It is an office-ready baby that can save you a lot of time searching in your wardrobe for an outfit. Just wear it with a pair of classic black or nude high heels, and you are ready to go!

image

This color combination will create an illusion of a smaller waist than actual. If you worry white color can expose the flaws in your figure, a dark color or a good print can help you out. To my personal taste, I love the combination of black and white, red and black, navy and yellow, green and black, etc. There are countless color combinations that you can choose to make this beauty.

The dress pattern I share in this post has a straight skirt. If you prefer a pencil design, narrow down the side seams, starting from the fullest part of the hip (marked with notches) down to hemline. It is a really quick modification, mark a point at the hemline at the desired width of skirt hemline and draw a straight line (the red lines) from the hip notch to the marked point. Then redraw the seam allowance (the blue lines) and cut the pieces. You can see in the demonstration below:

image

The pattern is created in pdf format using A4 paper. I can also create the pattern in other paper sizes (A0 to A4, Letter, Tabloid), so please inform me if you need them.

Not sure how to print and cut the patterns? Check the guide here.

Wondering why I do not add the side seam pockets to the pattern? Because it is too easy, just follow the quick instruction here.

Again, happy sewing! I look forward to seeing your masterpiece!

XOXO

Tiên the Little Sewist


Cutting instruction:

After taping down all the pages, the overall layout of the pattern pieces is like this:

image

The cutting instruction is for the dress with facings. If you choose to sew the dress with bias binding, skip the front facing and back facing pieces. If you choose to sew the dress with bodice lining, skip the facing pieces and cut out front and back pieces in lining fabric.

A. Front Skirt - 1pcs

B. Back Skirt - 2pcs

C. Front - 1pcs

D. Back - 2pcs

E. Sleeve - 2pcs

F. Front Facing - 1pcs + Fusible Interfacing – 1pcs

G. Back Facing - 2pcs + Fusible Interfacing – 1pcs

H. Front Waistband - 1pcs

I. Back Waistband – 2pcs


Download links for the dress:

Check for your size in the Size Chart before downloading. Not finding your size? Comment your height, bust – waist – hip measurements in the comment box below and I will send you the custom-made pattern for you!

Petite XS

Regular XS

Petite S

Regular S

Petite M

Regular M

Petite L

Regular L

Petite XL

Regular XL

Petite XXL

Regular XXL

Wednesday, June 20, 2018

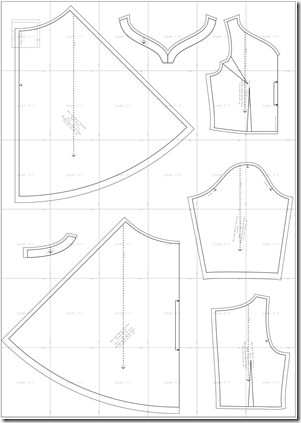
V neck half sleeve full circle dress pattern


(Scroll down for download links)

Playing the song “Red” by MAGIC! (I love this song!)

I said hey you with the red dress on
I gotta find a way to take it off
I got a lot of love and it's growing strong
When I see you with your red dress on

Red dress! I love red dresses! And I totally agree with the saying: “When in doubt, wear red” by Bill Blass. I am so in love with the bright and sexy color which makes all kind of styles so stylish. According to what I read about color theory, red color means energy, passion, love and power – an emotionally intense color. Red attire has distinct effect on both the wearers and people who see them. Red color makes the wearer more confident and happy, so choose a red piece when you feel down, and you will see your mood improved!


The pattern I am sharing today is inspired by a red dress I accidentally came upon when surfing Pinterest. The plus size model in this red midi dress looks totally stunning! A deep V neckline and a flirty full circle skirt make the dress a totally head-turner, even with the simplest or no acessories. And even better, this dress can magically flatter most types of body shape and turn them into almost hourglass shape!

I immediately decided to make myself a similar dress like this one! But I am not so confident to choose the bright red color, so I chose a darker shade – burgundy.

Of course, if red color is not your taste, you can choose a different color, like dark red, deep blue or dark green, etc. Just the shape of the dress is enough to make you stand out in the party.

The pattern is created in pdf format using A4 paper. I can also create the pattern in other paper sizes (A0 to A4, Letter, Tabloid), so please inform me if you need them.

Not sure how to print and cut the patterns? Check the guide here.

Again, happy sewing! I look forward to seeing your masterpiece!
XOXO
Tiên the Little Sewist

Download links for the V neck half sleeve full circle dress:

Check for your size in the Size Chart before downloading. Not finding your size? Comment your height, bust – waist – hip measurements in the comment box below and I will send you the custom-made pattern for you!


Instruction for cutting:

If you make this dress with lined bodice:
A. Front Bodice - 1pcs shell fabric + 1pcs lining fabric
B. Back Bodice - 2pcs shell fabric + 2pcs lining fabric
C. Front Skirt - 1pcs
D. Back Skirt - 2pcs
E. Sleeve - 2pcs

If you make this dress with interfacing:
A. Front Skirt - 1pcs
B. Back Skirt - 2pcs
C. Front Bodice - 1pcs
D. Back Bodice - 2pcs
E. Front Facing - 1pcs + Front Interfacing – 1pcs
F. Back Facing - 2pcs + Back Interfacing – 2pcs
G. Sleeve - 2pcs