Tuesday, May 5, 2020

Free PDF sewing pattern: Rosalie elastic waist cropped pants

Today I am sharing the newest pattern that I made recently: the Rosalie elastic waist cropped pants.

Rosalie elastic waist cropped pants
This is one of my favorite style – pants that are so comfortable and good looking at the same time! It features tapered legs (and you know, carrot legged pants are trendy this year – before the COVID-19 pandemic). Of course, when you stay and work from home, this style is so much better than the ones with zippers and non-elastic waistband.
This pair of pants is also really easy to sew, too. Even a total newbie can sew these pants without much trouble.
I always try my best to provide as many sizes as possible, so the Rosalie pants pattern comes in 10 sizes from XXS to 5XL, meaning it can fit ladies with hip measurements from 88cm/34.6in to 132cm/52in. Please refer to the Size guide for your specific size before printing out the pattern.
The pattern is made using layered PDF, please check for your desired size before printing so you won’t waste your paper. If you still do not know how to print a layered PDF, please check the Printing Guide.
You can print this using your home printer and A4/Letter paper. I calculated the printing area so that you will be able to use either type of paper to print the pattern out perfectly. Always print the first page first and check with the test square if you are printing at the right scale before you print out the whole pattern.
Cutting instruction:
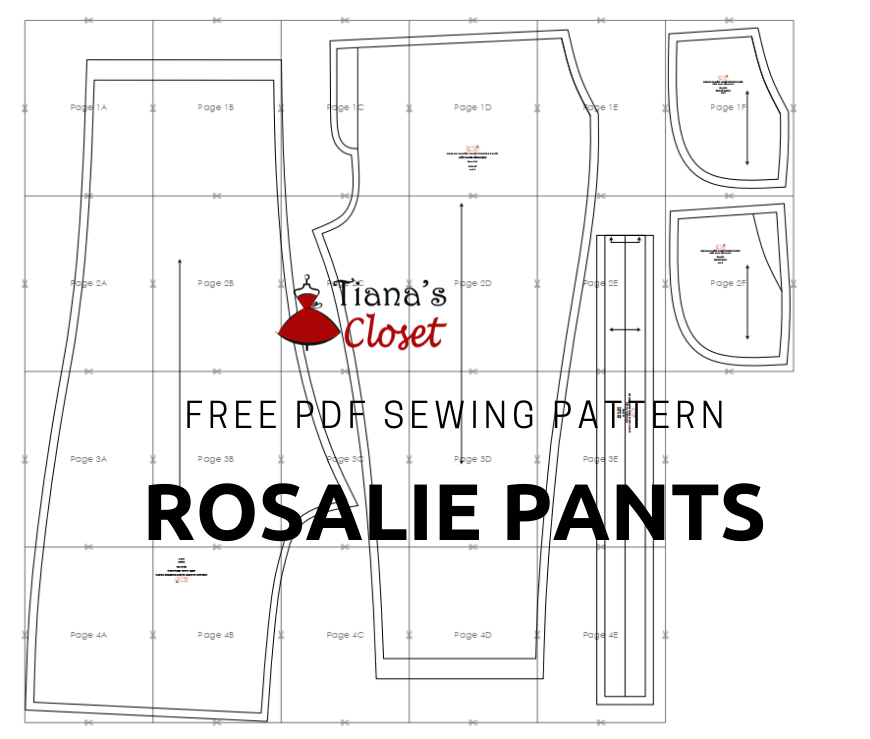
After taping down all the pages following the instruction, the overall layout of the pattern pieces is like this:

The pattern pieces are to be cut as follows:
A. Front – 2pcs
B. Back – 2pcs
C. Pocket Facing – 2pcs
D. Pocket Back – 2pcs
E. Waistband – 1pc
For sewing instruction and download link, please visit my official site: 
Happy sewing!
Tiana

Thursday, April 23, 2020

The 1-minute no sew face mask (with photo tutorial)

No sew face mask tutorial
The COVID-19 has been going on and does not have any signs of stopping, and we all must brace ourselves and get prepared to deal with it for a long time. Many readers told me that they cannot find mask making materials any where and must look for alternatives from the items in their homes.
Many people come to Tiana’s Closet website looking for a pattern to sew their own fabric face mask to cope with the COVID-19 pandemic. And I am happy to provide at least 4 ways to sew masks, from the super simple one for those who only know how to sew straight lines, to more complicating one that requires some skills. See my other posts in the DIY masks series here:
If you are looking for materials to make face mask, visit our little store here:
We have plastic nose wire, elastic, non-woven fabric for filters, anti-microbial fabric masks, hand made fabric masks to meet your needs. All items are ready in stock and will be shipped from Toronto, Canada. Same day shipping for orders before 3:00 PM. Free standard shipping for orders from US$75.00.

However, I have been receiving emails from readers who do not know how to sew at all, asking me if I know a way to make a face mask without sewing. And I realize that “Oh, there are many people out there who never touched a needle, let alone sew their own mask.” And although I know many people are sewing masks to give, many more people do not have access to a mask – or they have to wait for their masks to arrive, and as far as I know, delivery is now slower than ever due to the COVID-19 virus.
Then what do we do if we don’t have a mask, and do not know how to sew AT ALL?
I have the answer for you, let’s make a no sew face mask! It is not as good as a sewn face mask, but it can help you survive the days you wait for your mask to arrive (or until you learn how to sew).
The no sew face mask is really simple and can be made in a few steps.
WHAT YOU NEED:
– A handkerchief 10in x 10in (or scarf, bandana, square piece cut from your T shirt, etc)
– Two rubber bands (alternatives can be found at the end of the post)
HOW TO MAKE A NO SEW FACE MASK
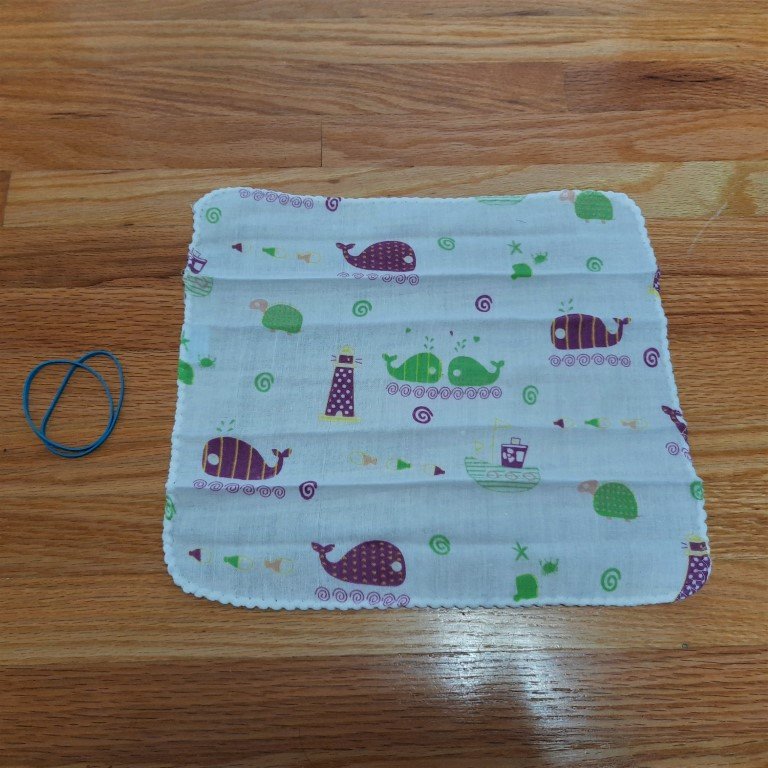
1. Lay the handkerchief flat on the table (or the floor).

No sew face mask tutorial
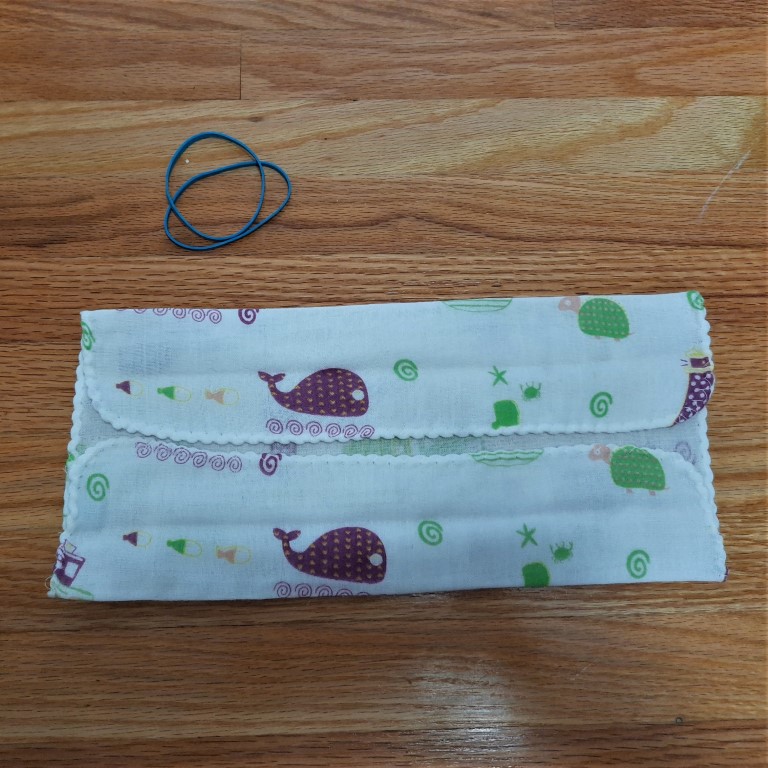
2. Fold one side of the handkerchief to the center line. Repeat with the other side. Now you get two ends meeting at the center line.

No sew face mask tutorial
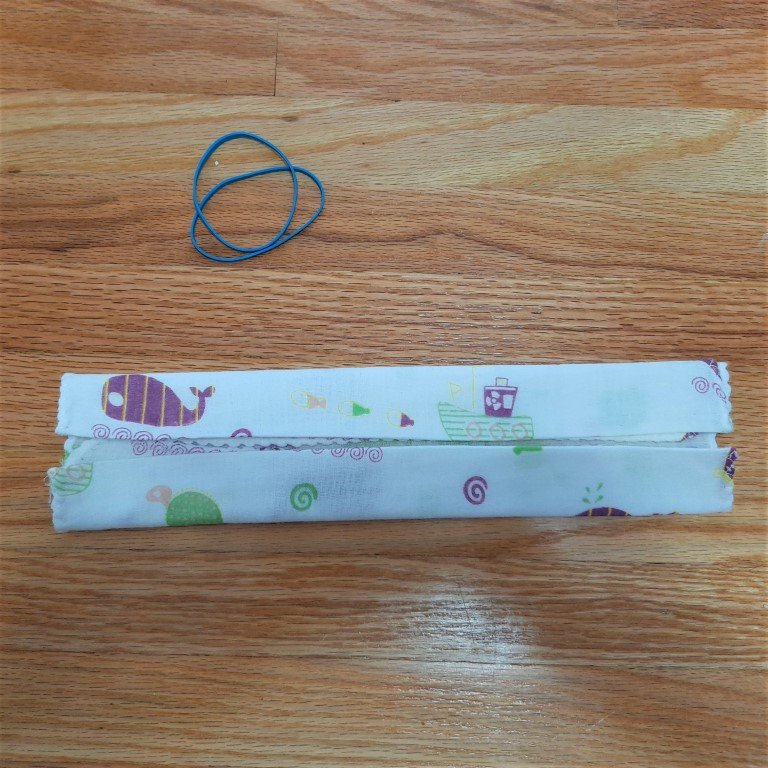
3. Fold the handkerchief again like in step 1.

No sew face mask tutorial
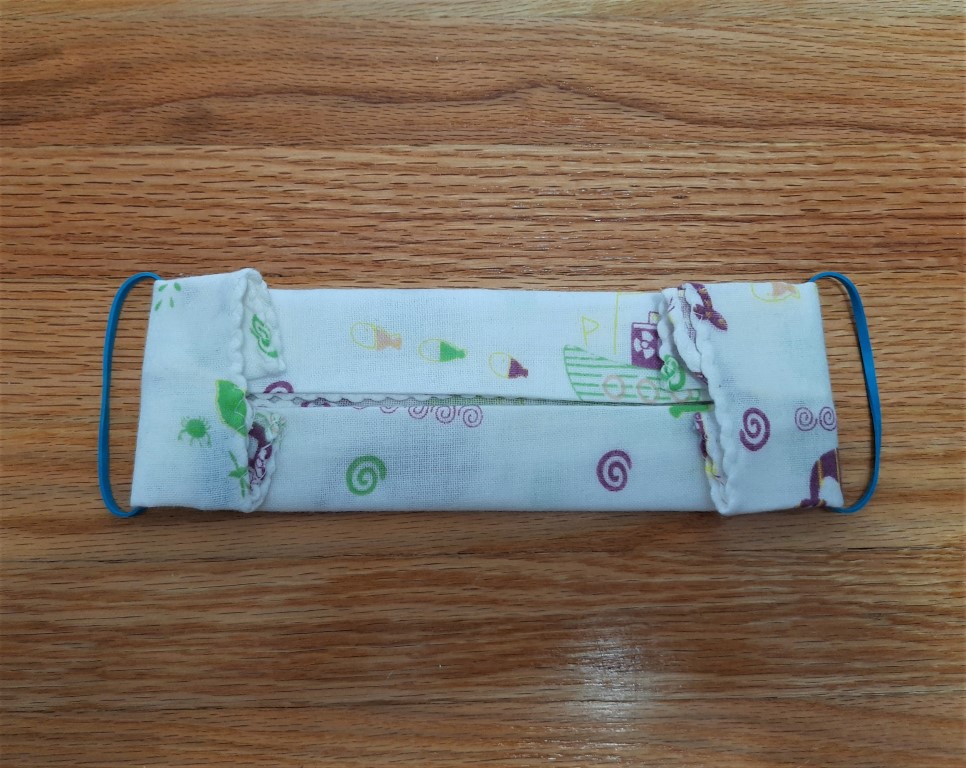
4. Put the rubber band through the short ends of the folded handkerchief and fold the short ends towards the center.

No sew face mask tutorial
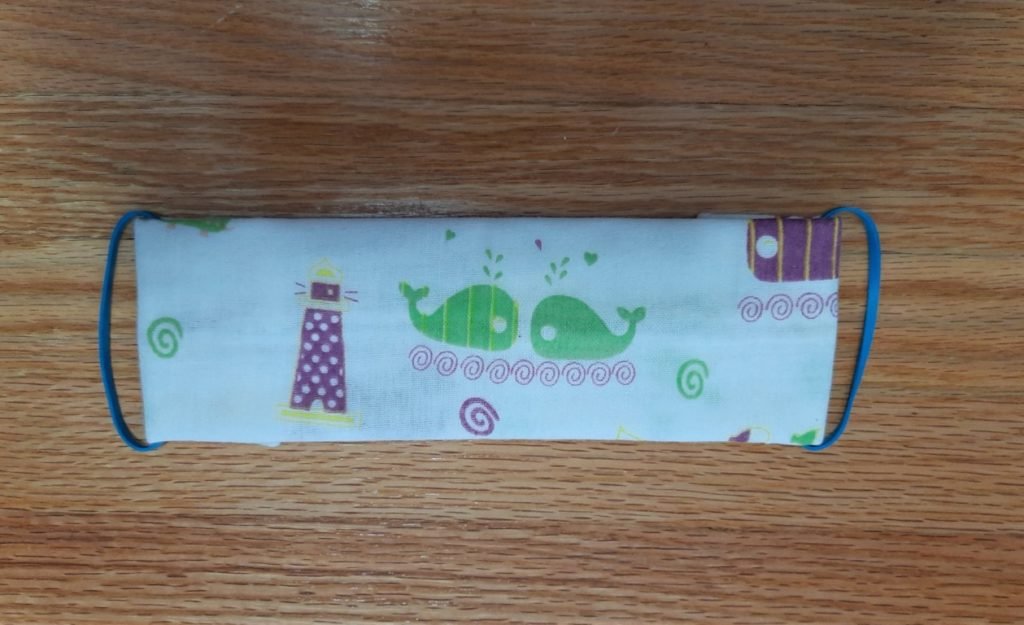
Now you got it, the no sew face mask! Simple, huh? It fits quite well, similar to my folded face mask. But you will need to re-make it every time you use it.

No sew face mask tutorial
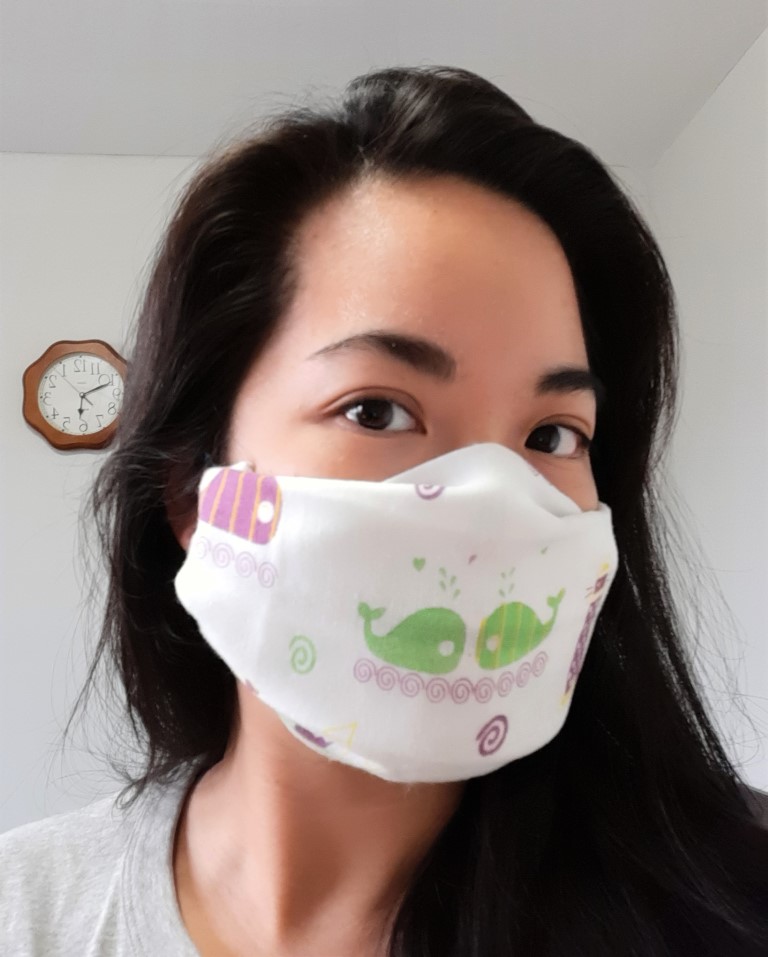
To put the mask on, you will need to put the folded mask on your face and pull the ear loops to your ears, then gently pull the flaps towards your nose and your chin.

No sew face mask tutorial
Ta-da! Now you have your own no sew fabric mask. It only takes you about 1 minute to make one, with the items you have ready in your house.
Of course, some may ask me, what if I do not have a handkerchief or rubber bands? I have come up with a few alternatives below:
ALTERNATIVES TO HANDKERCHIEF
– An old T shirt
– Bandana, scarf
– Any fabric item with rectangular shape, choose jersey or knitted fabric so that it does not fray
Any kind of fabric will work, as long as you cut them into a square of 10in x 10in.
ALTERNATIVES TO RUBBER BAND
– Strips cut from old T shirt – pull them so they curl to themselves and make them look similar to a round elastic cord.
– Strips cut from pantyhose, tights or leggings
– The elastic cuffs of socks
– Hair bands
Any alternative materials must be soft and elastic, because they will hang on your ears. I prefer strips from T shirt and pantyhose best, because they are softest and most elastic.
Love,
Tiana

How to sew a handkerchief

DIY handkerchief

Handkerchief is one of the essential items to carry with you. It is not only practical (you will find lots of time you need to wipe your hands or face, or tie your hair up and all you need is to pull your handkerchief out), but can also be a sign of your personality. Put a design on the corner of the handkerchief, and you have a unique item that belongs only to you!

Many people make handkerchiefs for themselves and also to give. Handkerchiefs with unique designs make great presents – imagine your beloved ones always keep your handkerchief with them. Quite a happy feeling, isn’t it? I do make a lot of handkerchiefs to use and give to my family and friends.
Sewing a handkerchief is also a simple project that does not take you much time or require much sewing skill. You only need to know how to sew a straight line, with sewing machine or just your hands, to make your own handkerchief. It is also a pleasant activity, when you are tired of making complex projects!
And the best thing is that it does not require you much fabric – a yard of 60 inch wide fabric can make 20 handkerchiefs!
Now let’s get started!
What you’ll need:
1. Materials
– A piece of cloth/fabric of your choice
– Thread of similar color to the main color of the fabric
2. Tools
– Scissors
– Ruler or tape measure
– Pencil/fabric marker
– Needle (for hand sewing) or sewing machine
How to make your own handkerchief in just 3 simple steps:
1. Iron and lay the fabric flat
2. Cut the fabric into your desired measurements
Measure the fabric using your ruler or tape measure and draw the lines to get a square. The handkerchief can be made in any size that you want. For example, the most common handkerchiefs often measure at 10 ½ x 10 ½ in.
Always remember to leave about ¼ in for seam allowance if you don’t want the handkerchief coming out smaller than you expect. Cut the fabric ¼ in from the lines, or if you are not confident with cutting parallel to the lines, draw before cutting.
3. Sew it
Fold all four sides of the fabric and make a narrow hem with a straight line. If you do not have a sewing machine, it’s fine, you can always hand sew it. Check my video for hand sewing instruction of how to make your own handkerchief. I can show you how to sew a hand rolled hem.
If you are using a sewing machine, it may get a bit tricky at the corners. You can get by it after practicing. But personally, I love hand sewn handkerchiefs, just because I love the softer hand rolled hem.
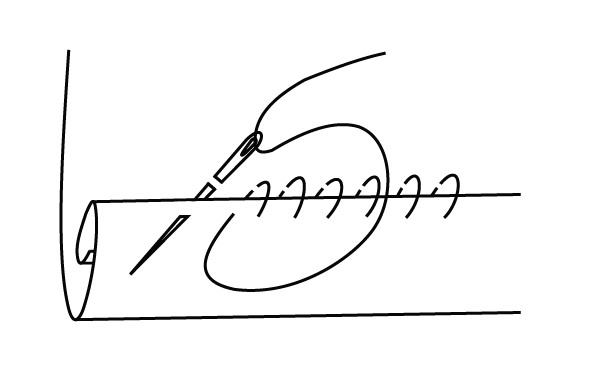
How to hand sew a narrow hem
This is how you sew a narrow hem.
4. Decorate the handkerchief (optional)
There are many ways you can make your handkerchief unique. Doodle on it with permanent marker. Or embroider your name or something cute on it.
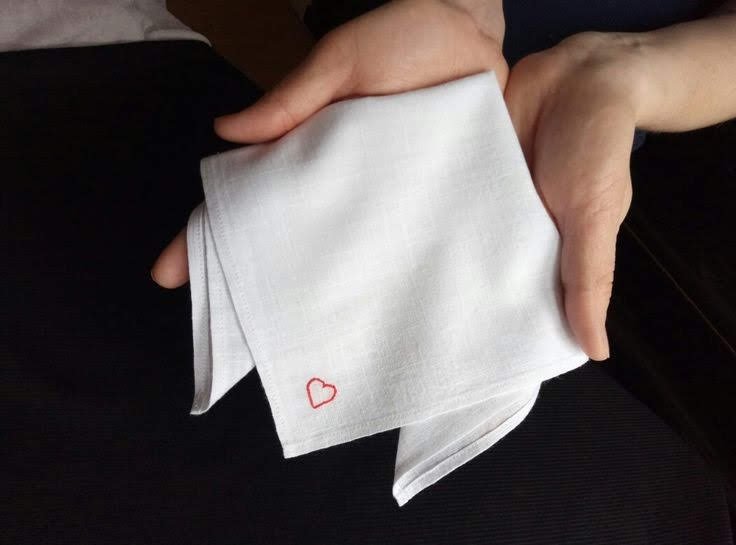
Just a small heart at the corner, and it makes the handkerchief special!
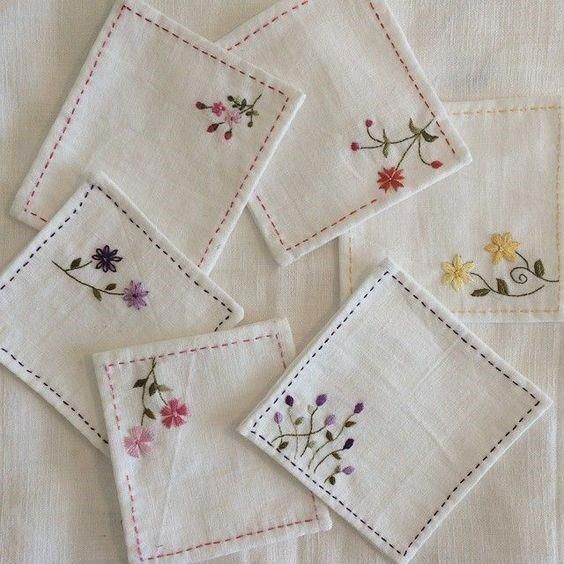
These are some embroidered handkerchiefs to inspire you with ideas. Do they look cute to you?

Tuesday, April 21, 2020

Simple DIY fabric face mask with filter pocket (no pattern or sewing machine needed!)

Hi there,
Staying at home because of the COVID-19 pandemic with nothing to do seems to make me more creative than ever! And after a few days of making mask non-stop, it seems like I have overthrown the claim of the easiest face mask ever, because I have found a totally new way of making a fabric face mask which is even easier than that. You can make it – even without a sewing machine. All you have to do is sewing straight lines and do some fold. An easy task for some extra protection against the highly infectious COVID-19 virus.
And here is a simple photo tutorial of this easy DIY fabric mask with filter pocket.
What you’ll need:
– Needle and thread
– 1 piece of fabric with measurements below
– 2 pieces of 12.5cm (5in) long elastic cord (or strips cut from old T-shirt, pantyhose, bias tape, etc., anything that you can get your hands on

If you are looking for materials to make face mask, visit our little store here:
We have plastic nose wire, elastic, non-woven fabric for filters, anti-microbial fabric masks, hand made fabric masks to meet your needs. All items are ready in stock and will be shipped from Toronto, Canada. Same day shipping for orders before 3:00 PM. Free standard shipping for orders from US$75.00.
Fabric measurements:
For men, 20cm * 40cm (8in * 16in)
For women and teens, 18cm * 36cm (7 1/8 in * 14 1/4 in)
For kids, 16cm * 32cm (6 1/4 in * 12 1/2 in)
Sewing instruction:
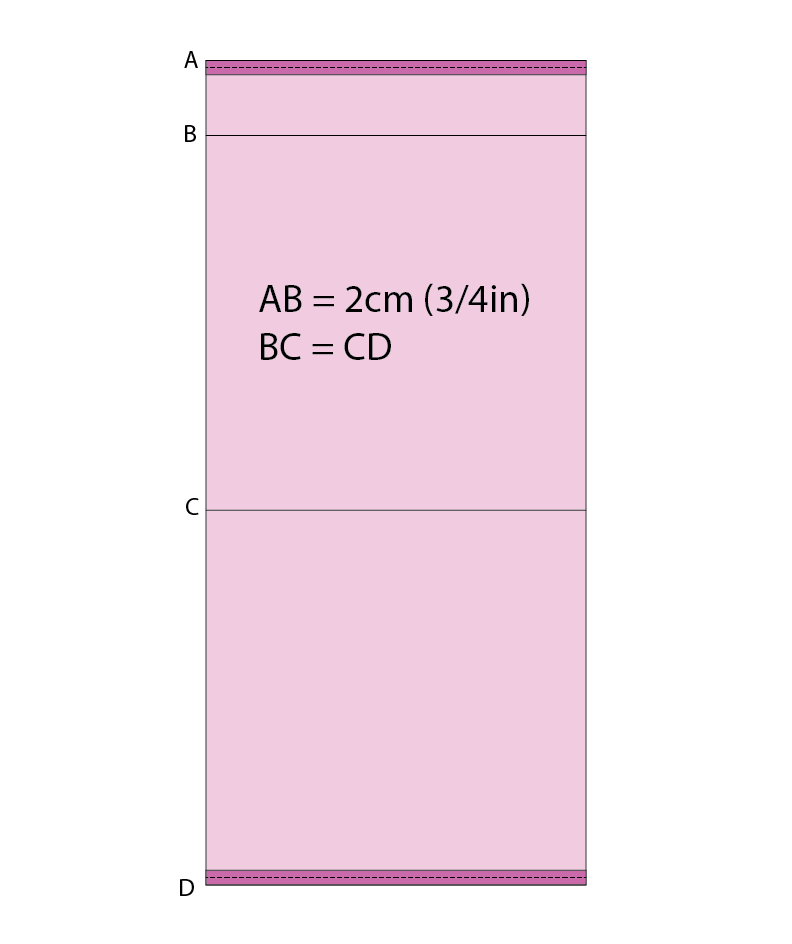
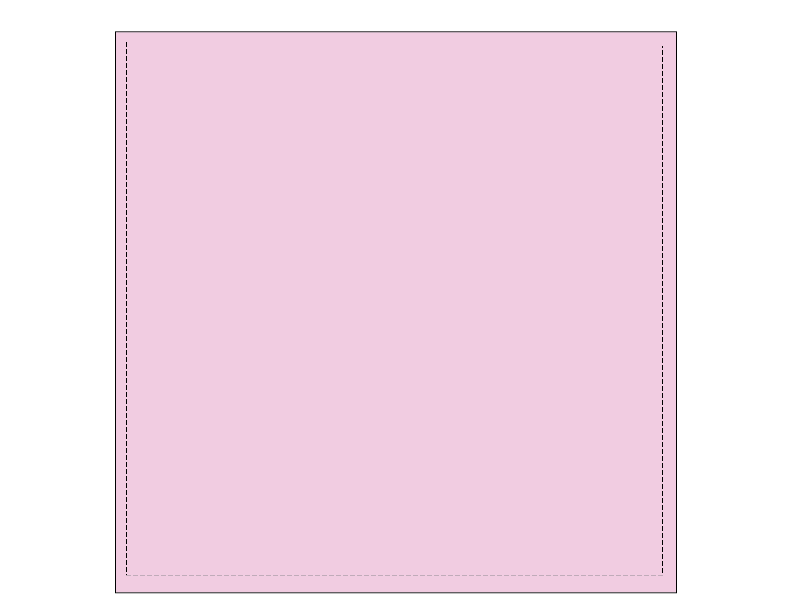
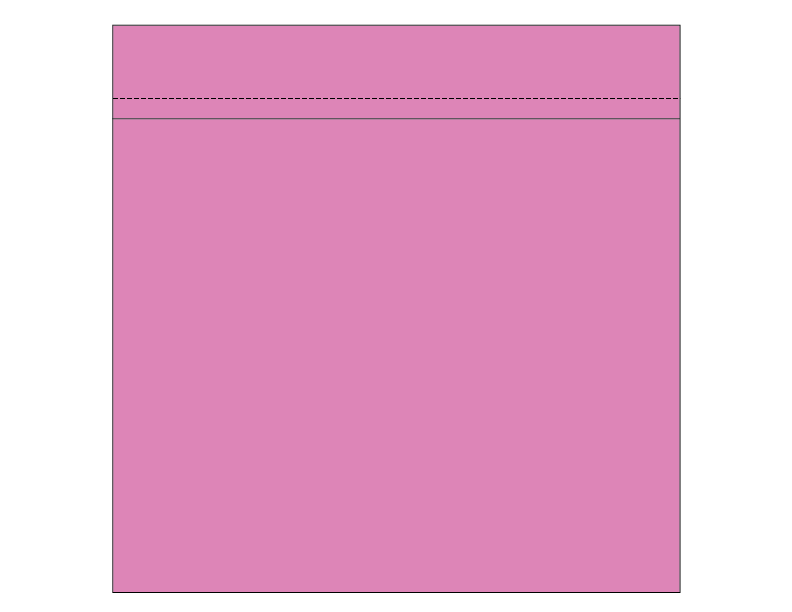
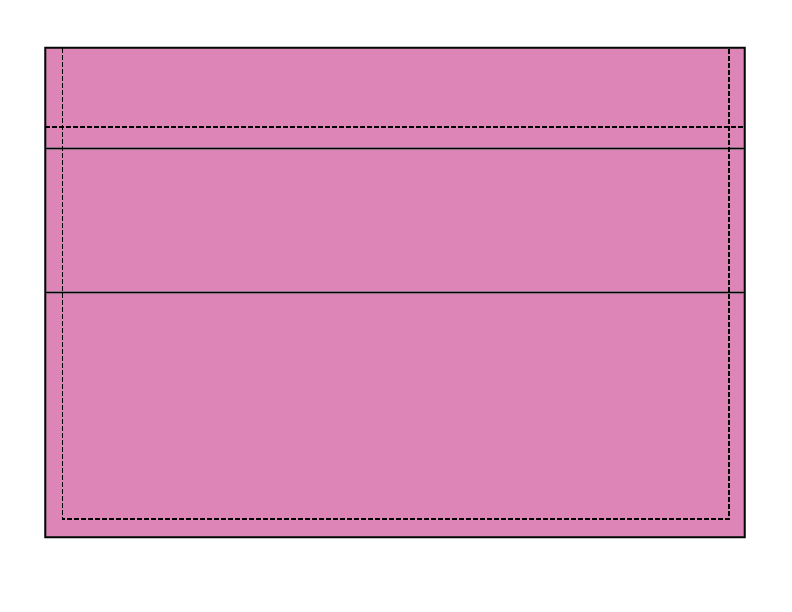
Step 1: Fold one short end of the fabric piece twice to the wrong side and sew a narrow hem. Repeat with the other end. Draw two lines according to the picture shown below.


Easy DIY two layer fabric mask with filter pocket
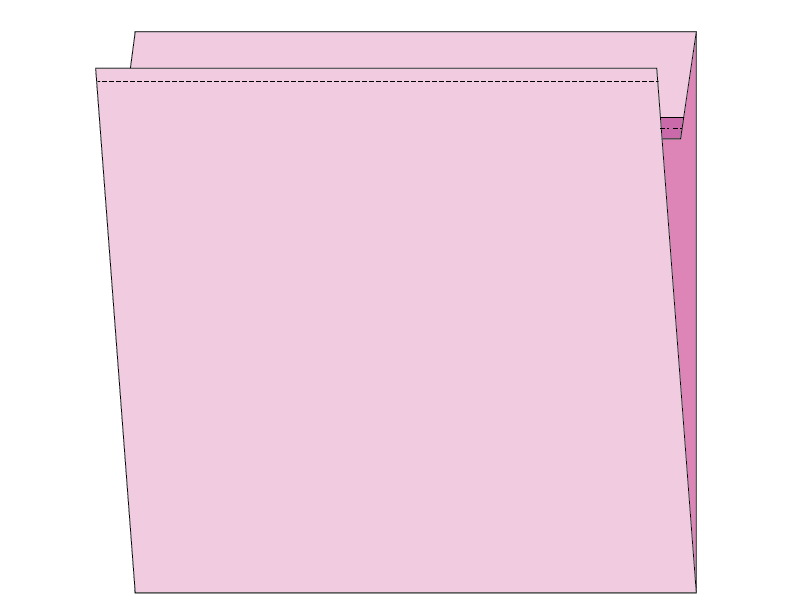
Step 2: Fold the fabric (right side of fabric facing in).


Easy DIY two layer fabric mask with filter pocket
Step 3: Sew along the sides, leaving the top (with hemmed end) open.


Easy DIY two layer fabric mask with filter pocket
Step 4: Trim the corners, turn the fabric inside out. Press if necessary. You will get something similar to a small pillow cover.


Easy DIY two layer fabric mask with filter pocket
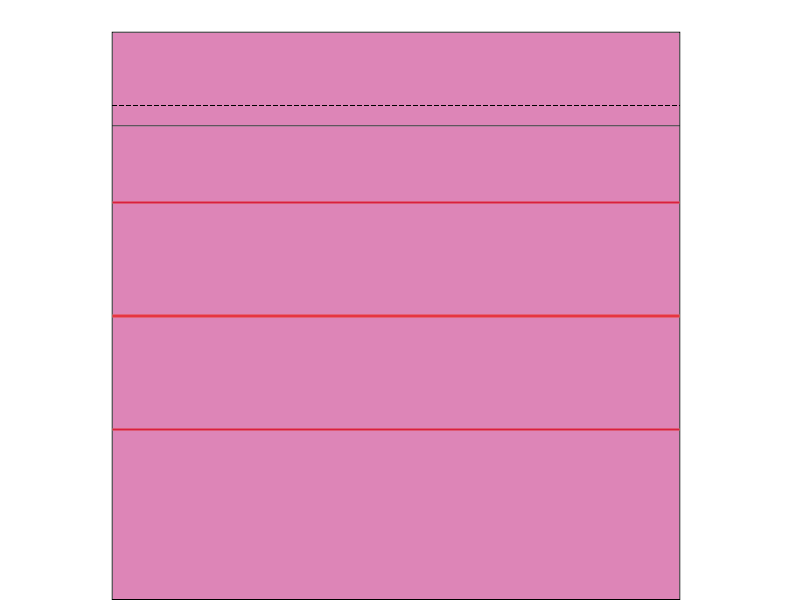
Step 5: Draw the center line of the mask. Draw two parallel lines 5cm (2in) from the center line (the red lines).


Easy DIY two layer fabric mask with filter pocket
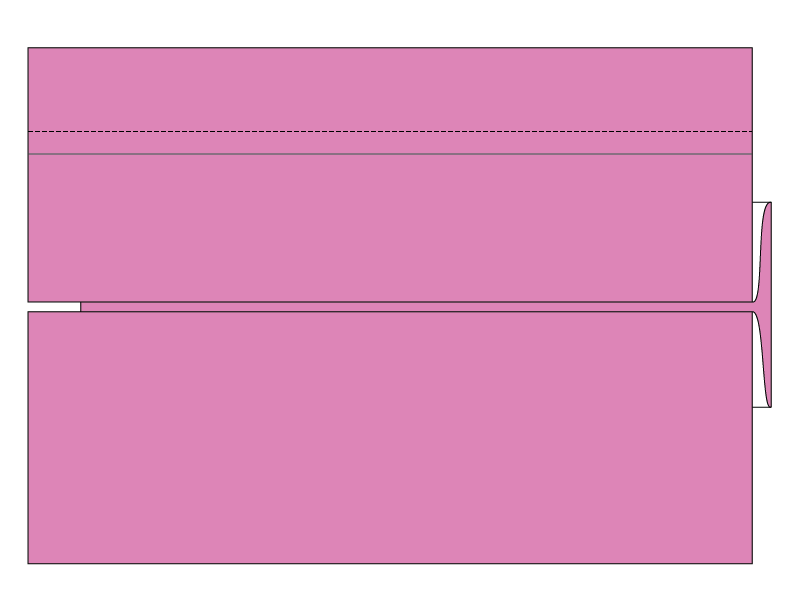
Step 6: Make a box pleat from the lines and pin to secure.


Easy DIY two layer fabric mask with filter pocket
Step 7: Top stitch around the side of the mask, securing the pleat, leaving an opening at the top of the mask (with the flap). This is where you insert your filter in.


Easy DIY two layer fabric mask with filter pocket
Step 8: Attach elastic to the sides of the mask. Actually you can do this from step 2, but because this tutorial is intended for inexperienced sewers, I think adding the elastic at this last step is easier.


Easy DIY two layer fabric mask with filter pocket
And here is the view for two sides of the mask. You can see the flap at the inside side of the mask.


Easy DIY fabric mask with filter pocket
You can put the filter in from the top of the mask:


Easy DIY fabric mask with filter pocket
And this is the mask on the very reluctant model (aka my hubby):


Easy DIY fabric mask with filter pocket
I definitely think that this DIY mask is better than any other masks, because it is quick to make and still has the ‘pocket’ to put the filter in for extra protection. It only requires a small piece of fabric (and as I have tried, a pillow cover can make up to 8 masks of this type). It is so simple that anyone can make it, even without a sewing machine.
The mask fits nicely on the face, even without nose wire. However, if you want to add one, just put it inside the top of the mask.
Now let’s try to make more masks. I am making and donate a dozen of them to the hospitals.
See my other posts in the DIY masks series here:
Stay home, sew masks, save lives!
Love,
Tiana