Saturday, January 27, 2018

Basic dress block #2

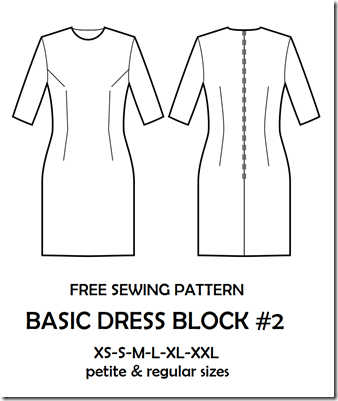
I am posting here the basic dress block with the shoulder darts moved to the armhole and a half sleeve. The basic dress block with shoulder darts and long sleeve has been posted on my blog here. I am calling it dress block #1.

I plan to make some tutorial on pattern drafting, and that’s why I am going to post all the basic dress blocks with the darts moved around so that you can download whatever pattern you want and draft along – just to save you a lot of time drafting the basic blocks. And to save you some more time, I removed the seam allowance. You will not need to cut it off like the basic dress block #1 before starting to modify the pattern to your ideas.
image

This block has the front darts moved to armhole, and back shoulder darts removed. Although it is a basic dress block, you can also sew it into a sheath dress. It still looks really nice! I still make the kick pleat so that anyone who wants to make a dress from this block can use them if you want. Just add seam allowance, and it is ready to go!

PLEASE REMEMBER: THIS BASIC DRESS BLOCK DOES NOT HAVE SEAM ALLOWANCE! ADD SEAM ALLOWANCE BEFORE YOU SEW!

The pattern is created in pdf format using A4 paper. I can also create the pattern in other paper sizes (A0 to A4, Letter, Tabloid), so please inform me if you need them.

Print the patterns on A4 paper at actual size/no scaling/100%. Not sure how to print and cut the patterns? Check the guide here.

Do you want to add side seam pockets to the pattern for additional convenience? Just go ahead because it is too easy, just follow the quick instruction here.

Again, happy sewing! I look forward to seeing your masterpiece!

XOXO

Tiên the Little Sewist

Cutting instruction:

After taping down all the pages following the instruction, the overall layout of the pattern pieces is much like this (the arrangement of pattern pieces will vary a bit with sizes because I want to utilize all space to result in least number of pages):

image

The cutting instruction is for the garment with facings. If you choose to sew it with bias binding, skip the front facing and back facing pieces. If you choose to sew with bodice lining, skip the facing pieces and cut a set of front and back pieces in lining fabric.

A. Front - 1pcs
B. Back - 2pcs
C. Sleeve - 2pcs
D. Front Facing – 1pcs + Fusible Interfacing – 1pcs
E. Back Facing – 2pcs + Fusible Interfacing – 2pcs

Download links for the dress:

Check for your size in the Size Chart before downloading. Not finding your size? Comment your height, bust – waist – hip measurements in the comment box below and I will send you the custom-made pattern for you as soon as I can!

Petite XS

Regular XS

Petite S

Regular S

Petite M

Regular M

Petite L

Regular L

Petite XL

Regular XL

Petite XXL

Regular XXL


Wednesday, January 24, 2018

Peplum top pattern

(Scroll down to the end of the post for download links)

Anyone loves the peplum top here? I bet there are! Because who would not love the design that can miraculously flatter your body shape and cover up your flaws in waist and hips? I also have a peplum top in my closet to mix with jeans or treggings when I want to be comfortable without being frumpy. You know I am short and curvy, and anything relating to layering will make me a rag doll at once, except for the peplum top.

image

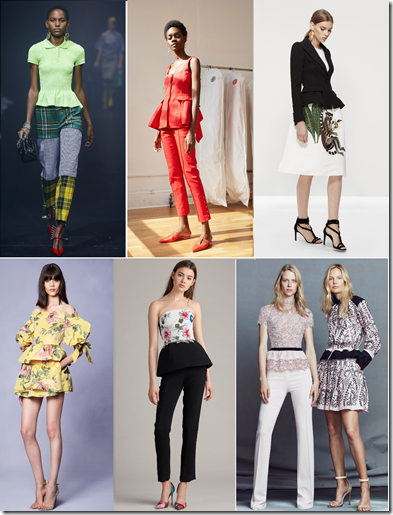
If you are worried that peplum tops are out of date, don’t worry. After a few years lending the stage to bell sleeves and other statement making trends, the top that flares in the waist is back! On the runway, of course. You can see peplum tops in the collections of Balenciaga, Rosie Assoulin, Monique Lhuillier, Marchesa, Zuhair Murad, etc. And when these trend setters say peplum is back, it’s back! Why not make yourself this flattering baby to catch up with the trends?

image

(Left to right, top down: Balenciaga, Rosie Assoulin, Oscar de la Renta, Marchesa, Monique Lhuillier, Zuhair Murad)

Of course I am sharing a design that is more applicable than those on the runway – after all, we cannot always bring the runway fashion as-is to our daily life (However, if I have a piece of Oscar de la Renta or Zuhair Murad like above, I am more than happy to wear them – it’s impossible because of budget problem, haha). So, the peplum top I will make for myself will be a simpler design – with boat neckline, half sleeve and full circle peplum. The peplum is long enough to cover your hips, and you can adjust its length to make one most suitable with your taste.

The pattern is created in pdf format using A4 paper. I can also create the pattern in other paper sizes (A0 to A4, Letter, Tabloid), so please inform me if you need them.

Print the patterns on A4 paper at actual size/no scaling/100%. Not sure how to print and cut the patterns? Check the guide here.

Do you want to add side seam pockets to the pattern for additional convenience? Just go ahead because it is too easy, just follow the quick instruction here.

Again, happy sewing! I look forward to seeing your masterpiece!

XOXO

Tiên the Little Sewist

Cutting instruction:

After taping down all the pages following the instruction, the overall layout of the pattern pieces is much like this (the arrangement of pattern pieces will vary a bit with sizes because I want to utilize all space to result in least pages):

image

The cutting instruction is for the garment with facings. If you choose to sew the garment with bias binding, skip the front facing and back facing pieces. If you choose to sew the garment with bodice lining, skip the facing pieces and cut a set of front and back pieces in lining fabric.

A. Back Peplum - 2pcs
B. Front Peplum - 1pcs
C. Front - 1pcs
D. Back - 2pcs
E. Sleeve - 2pcs
F. Front Facing – 1pcs + Fusible Interfacing – 1pcs
G. Back Facing – 2pcs + Fusible Interfacing – 2pcs

Download links for the peplum top pattern:

Check for your size in the Size Chart before downloading. Not finding your size? Comment your height, bust – waist – hip measurements in the comment box below and I will send you the custom-made pattern for you as soon as I can!
Sunday, January 21, 2018

Burberry look-alike dress pattern


(Download links at the end of the post)

Do you love the Black Sculptural Cotton Silk Dress by Burberry London in the 2015-2016 collection here? Although it has been 3 years, but the style is still not out of date at all. The dress can be worn from 9 to 5 and straight to a dinner date. And it comes with a skyrocketing price of 1990 bucks!


And if you are just too poor to buy this $1990 baby (like me!), you can copy the style and sew yourself one with the resources you can get your hands on. We may not have the luxurious cotton silk like they have, but we have many other choices. If you are not into exactly the same color and texture of the original dress, you can choose something a bit different.

This dress features a round neck, A line knee length skirt and short sleeves. It has all front darts moved to waist sides and a pleat at the center of the front skirt. This dress is fairly simple to sew, of course if you want to make it look expensive, remember to make every cut and seam sharp and clean. You will not have a nice dress if the seams are not correctly aligned, or the cuts are not clean enough. Prints may help you cover some of the flaws, but if you choose a plain color, you must be extra careful.

The pattern is created at knee length. If you prefer a longer or shorter dress, modify the pattern accordingly. Burberry also has a sleeveless version for this dress, so you can try making one if you’ve got the mood.

The pattern is created in pdf format using A4 paper. The patterns use the sizes in the size chart here. If your size is different from the one shown in my blog, please comment your measurements below. I will make a pattern closest to your measurements. I can also create the pattern in other paper sizes (A0 to A4, Letter, Tabloid), so please inform me if you need them.

Not sure how to print and cut the patterns? Check the guide here.

Again, happy sewing! I hope to see your masterpiece!
XOXO
Tiên the Little Sewist

Instruction for cutting (for newbies – if you are not one, just scroll down to the download links).

A. Front Waistband - 1pcs
B. Back Waistband - 2pcs
C. Front Skirt - 1pcs
D. Back Skirt - 2pcs
E. Front - 1pcs
F. Back - 2pcs
G. Front Facing - 1pcs + Interfacing – 1pcs
H. Back Facing - 2pcs + Interfacing – 2pcs
I. Sleeve - 2pcs

Lay your fabric of choice flat on the table according to straight of grain as marked by the dashed arrow on the pattern pieces.

The front bodice, front waistband and front skirt will be cut on fold, so you need to correspond the folded edge with the one marked with a fold mark on the pattern piece.

Cut the fabric according to the quantity required on each pattern block. For example, if the pattern shows Main, Interfacing – cut 1+1”, it means that you need to cut 1 piece as is and 1 mirrored piece from the main fabric as well as from interfacing.

Mark all notches from the pattern pieces to your fabric. When sewing the dress, you need to pay attention to notches to match them up.

Download links for the Burberry look-alike dress:

Check for your size in the Size Chart before downloading.


Thursday, January 18, 2018

V neck 3/4 sleeve sheath dress pattern

(Scroll down to the end of the post for download links)

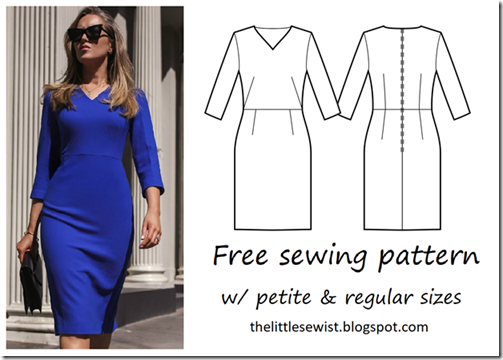
I am sharing the pattern for another office ready dress – the V neckline sheath dress inspired by the owner of the blog 30 Dresses in 30 Days.

image

This dress features a V neckline which is not too deep to ensure the dress is modest enough for professional setting. Although it is a basic piece, the dress gives the wearer the feeling of a confidence and power. I can imagine the office lady wearing this in an important meeting with clients – mixing it with neat hair updo, document files and black high heels – and impress the people in the meeting room. Or if you want to soften the image of a powerful woman, let your hair fall on your shoulder in soft curls, just like the girl in the image did.

One reason that inspire me to make the pattern for this dress is its color. I love cobalt blue. It is the royal color which gives the wearer the feeling of superiority and confidence. It is also not too bright, not too bold to make you look out of place in a serious professional event. Of course, if you prefer another color, just go with it. I am sure this baby will be great in almost any color!

This dress pattern has a straight skirt. If you prefer a pencil design, narrow down the side seams, starting from the fullest part of the hip (marked with notches) down to hemline. It is a really quick modification, mark a point at the hemline at the desired width of skirt hemline and draw a straight line (the red lines) from the hip notch to the marked point. Then redraw the seam allowance (the blue lines) and cut the pieces. You can see in the demonstration below:

image

The pattern is created in pdf format using A4 paper. I can also create the pattern in other paper sizes (A0 to A4, Letter, Tabloid), so please inform me if you need them.

Not sure how to print and cut the patterns? Check the guide here.

Do you want to add side seam pockets to the pattern for additional convenience? Just go ahead because it is too easy, just follow the quick instruction here.

Again, happy sewing! I look forward to seeing your masterpiece!

XOXO

Tiên the Little Sewist

Cutting instruction:

After taping down all the pages following the instruction, the overall layout of the pattern pieces is much like this (the arrangement of pattern pieces will vary a bit with sizes because I want to utilize all space to result in least pages):

image

The cutting instruction is for the dress with facings. If you choose to sew the dress with bias binding, skip the front facing and back facing pieces. If you choose to sew the dress with bodice lining, skip the facing pieces and cut a set of front and back pieces in lining fabric.

A. Front Skirt - 1pcs

B. Back Skirt - 2pcs

C. Sleeve - 2pcs

D. Front - 1pcs

E. Back - 2pcs

F. Front Facing - 1pcs

G. Back Facing - 2pcs

Download links for the dress:

Check for your size in the Size Chart before downloading. Not finding your size? Comment your height, bust – waist – hip measurements in the comment box below and I will send you the custom-made pattern for you!